Create and manage automations to streamline your workflow.
Reduce manual work, improve consistency, and save time. Automations are available on the Broker PRO and Non-Del Plans.
Important Information about Contract Processors and Automation Rules & Tasks:
If you're working with a contract processor, the hiring company (not the processor's company) must configure all automations and task templates under their own company settings.

The hiring company must:
 - Set up task templates
 - Create automation rules
 - Assign the task to the Processor Role
TABLE OF CONTENTS
- What Are Automations?
- Quick Start Steps
- Managing Automation Rules
- How to Create a New Automation Rule
- Triggers (What Starts a Rule)
- Automation Criteria (Filters)
- Actions (What ARIVE Will Do)
- FAQs & Best Practices
- Real-World Examples
What Are Automations?
Automations = Rules that ARIVE follows.
Automations are rules that tell ARIVE what to do when something happens in a loan file. These rules reduce manual work, improve consistency, and save time.
When a specific event (called a trigger) occurs, ARIVE performs one or more actions like:
Sending an email
Creating tasks
Updating loan statuses
Quick Start Steps
- Click your Profile Icon in the top-right corner of the screen, then click Company Settings.
- Go to Automation Rules to view or edit automations.
- Go to Task Templates to create standard task templates with due dates and auto-complete rules when used in automation.
- Click + New Rule (top-right) to create a new rule.
- Select a Trigger (what starts the rule).
- Add Criteria (optional filters to narrow which loans it applies to).
- Choose an Action (what ARIVE will do).
- Click Add Rule (bottom-right).
- Test your rule on a sample loan to avoid conflicts.
Want a detailed walkthrough with screenshots? See “How to Create a New Automation Rule” below.
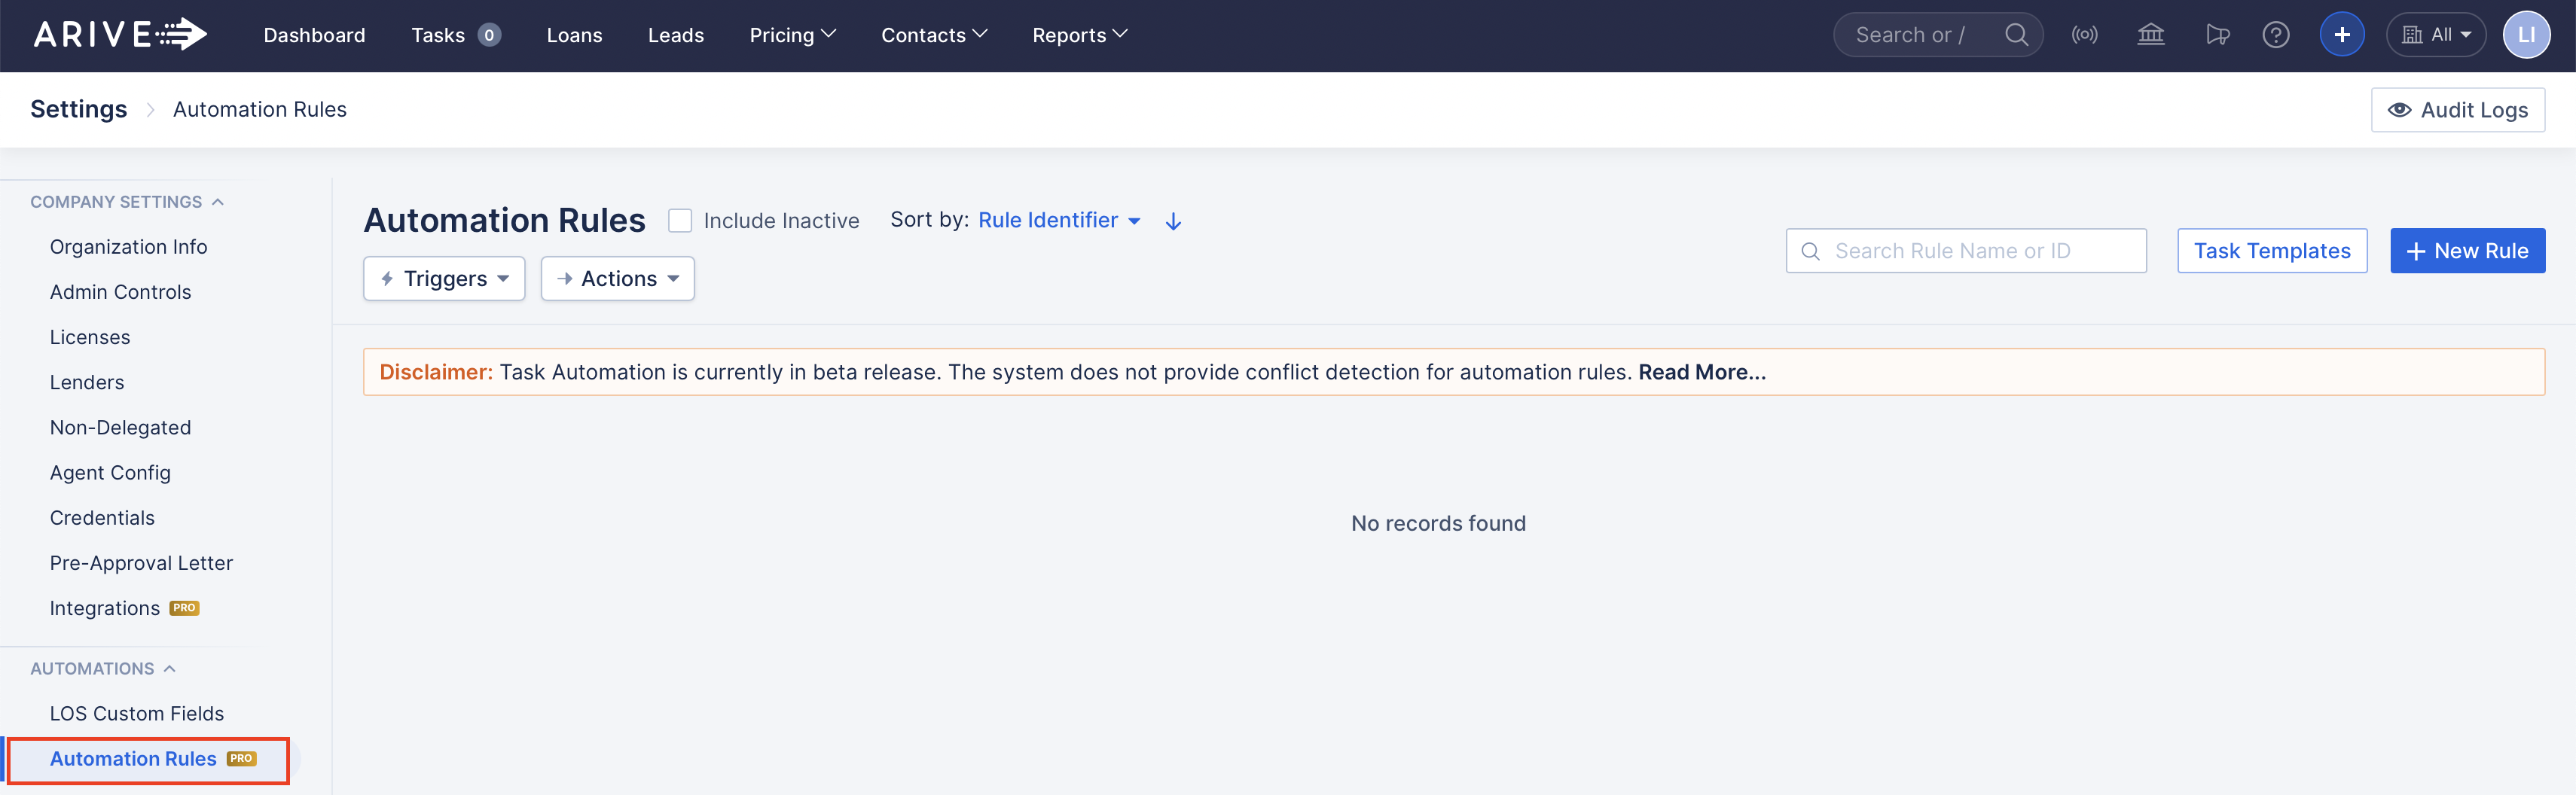
Managing Automation Rules
- View All Rules:
Go to Company Settings > Automation Rules.
Make sure the Include Inactive checkbox is unchecked.

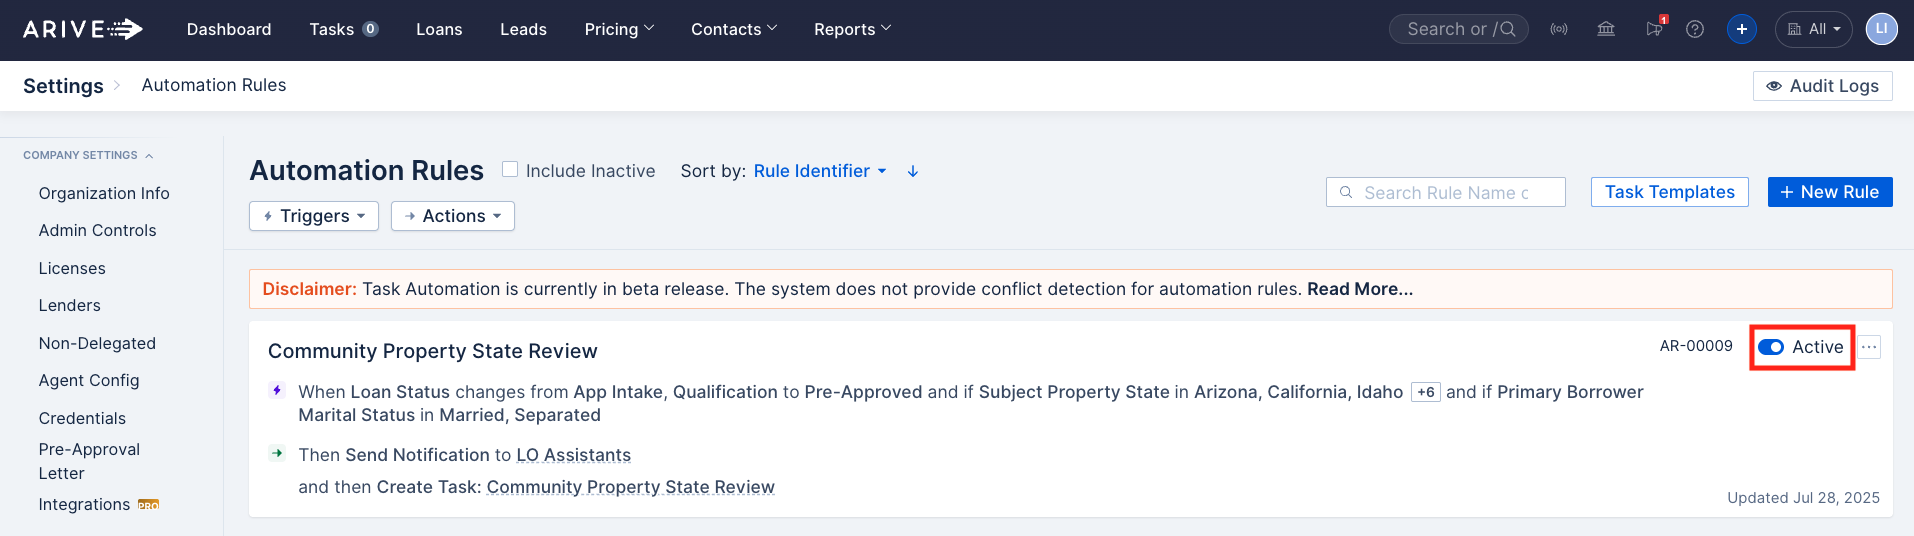
Enable/Disable Rules:
Toggle the switch next to a rule to turn it on or off.
To view inactive rules, check the Include Inactive box at the top.
Filter Rules:
Use Triggers or Actions dropdown menus to quickly narrow down rules by type.
Use the Search bar to find a rule by name.

Sort Rules:
Click Sort by (top middle) to sort by:
Rule Identifier (default), Rule Name, Date Created, or Last Update.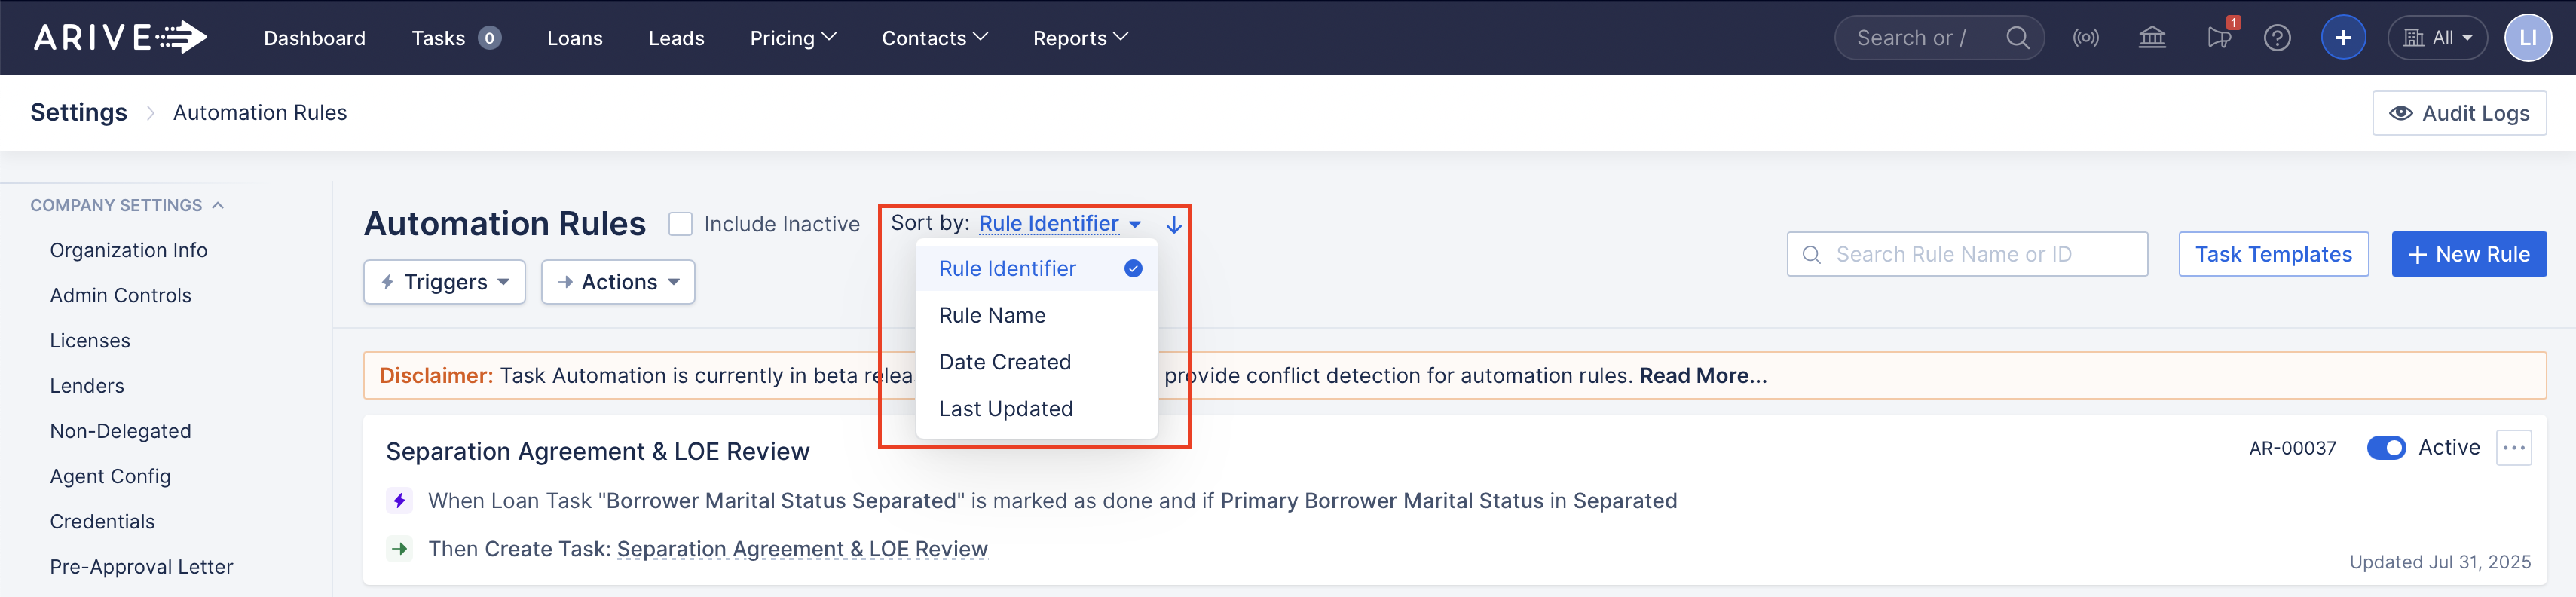
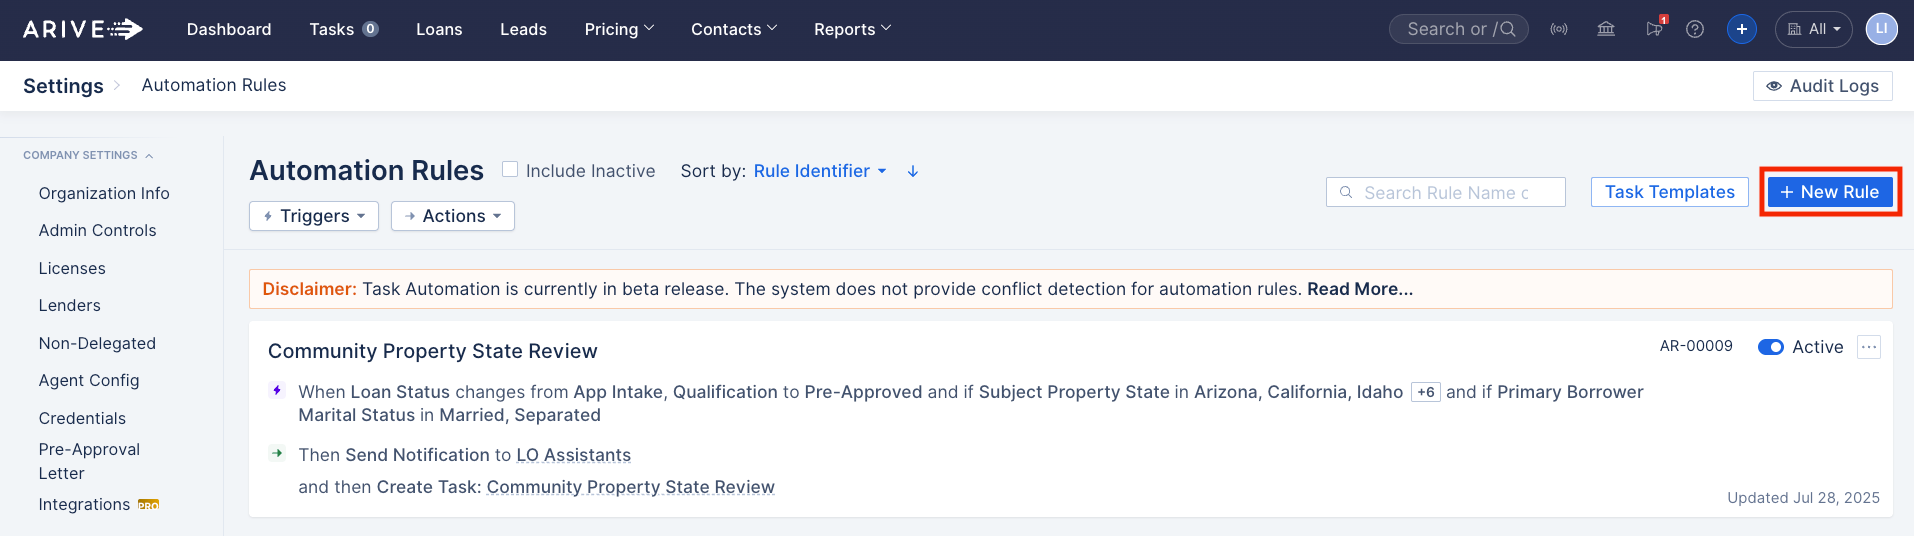
Create or Edit Rules:
Click + New Rule to create a new one, or click the rule name to edit.
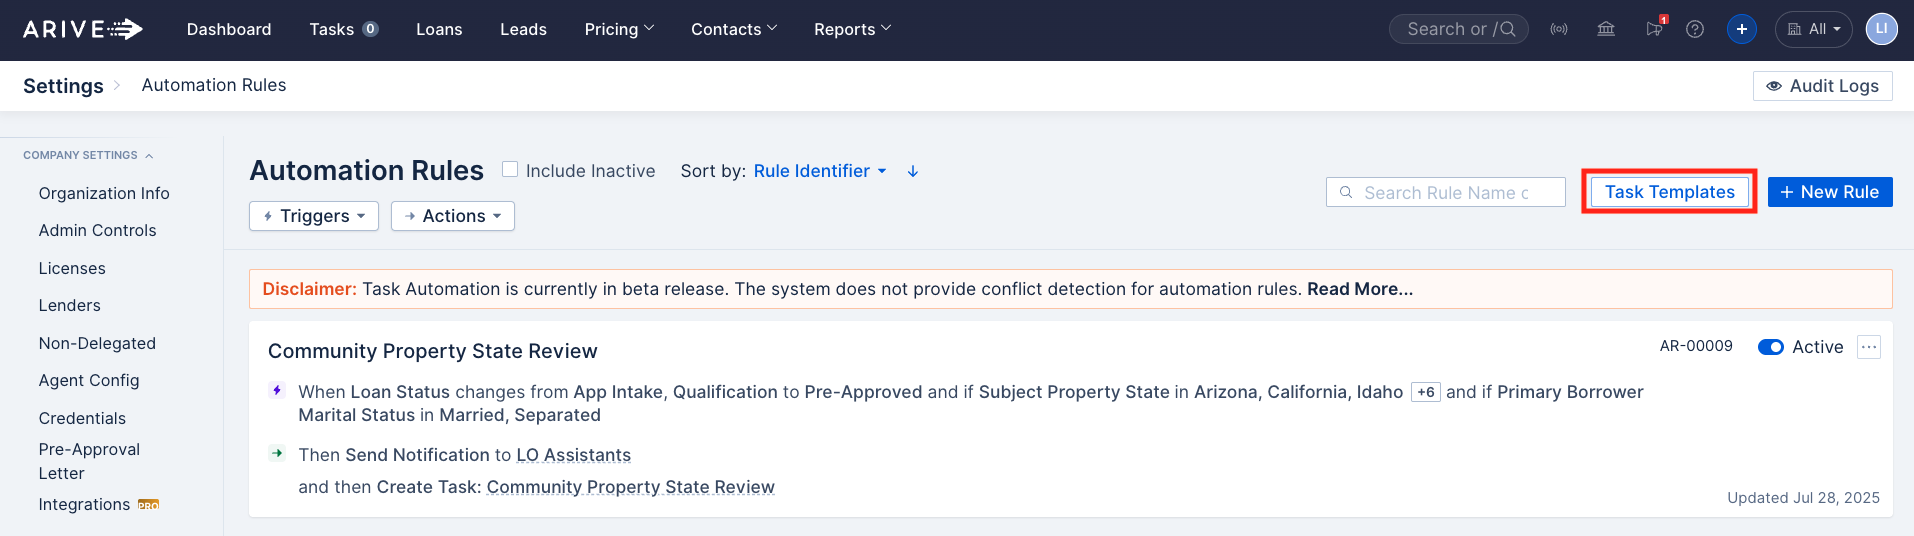
Add Task Templates:
- Click Task Templates (top-right) to create reusable task lists.
- Add these templates under Actions → Create Tasks when building a rule.
How to Create a New Automation Rule
Already familiar with this process? Jump to “Quick Start Steps” above for a summarized checklist.
- Click on your Profile Icon in the top right corner of the screen, then click Company Settings.
- Go to Automation Rules to view or edit automations.
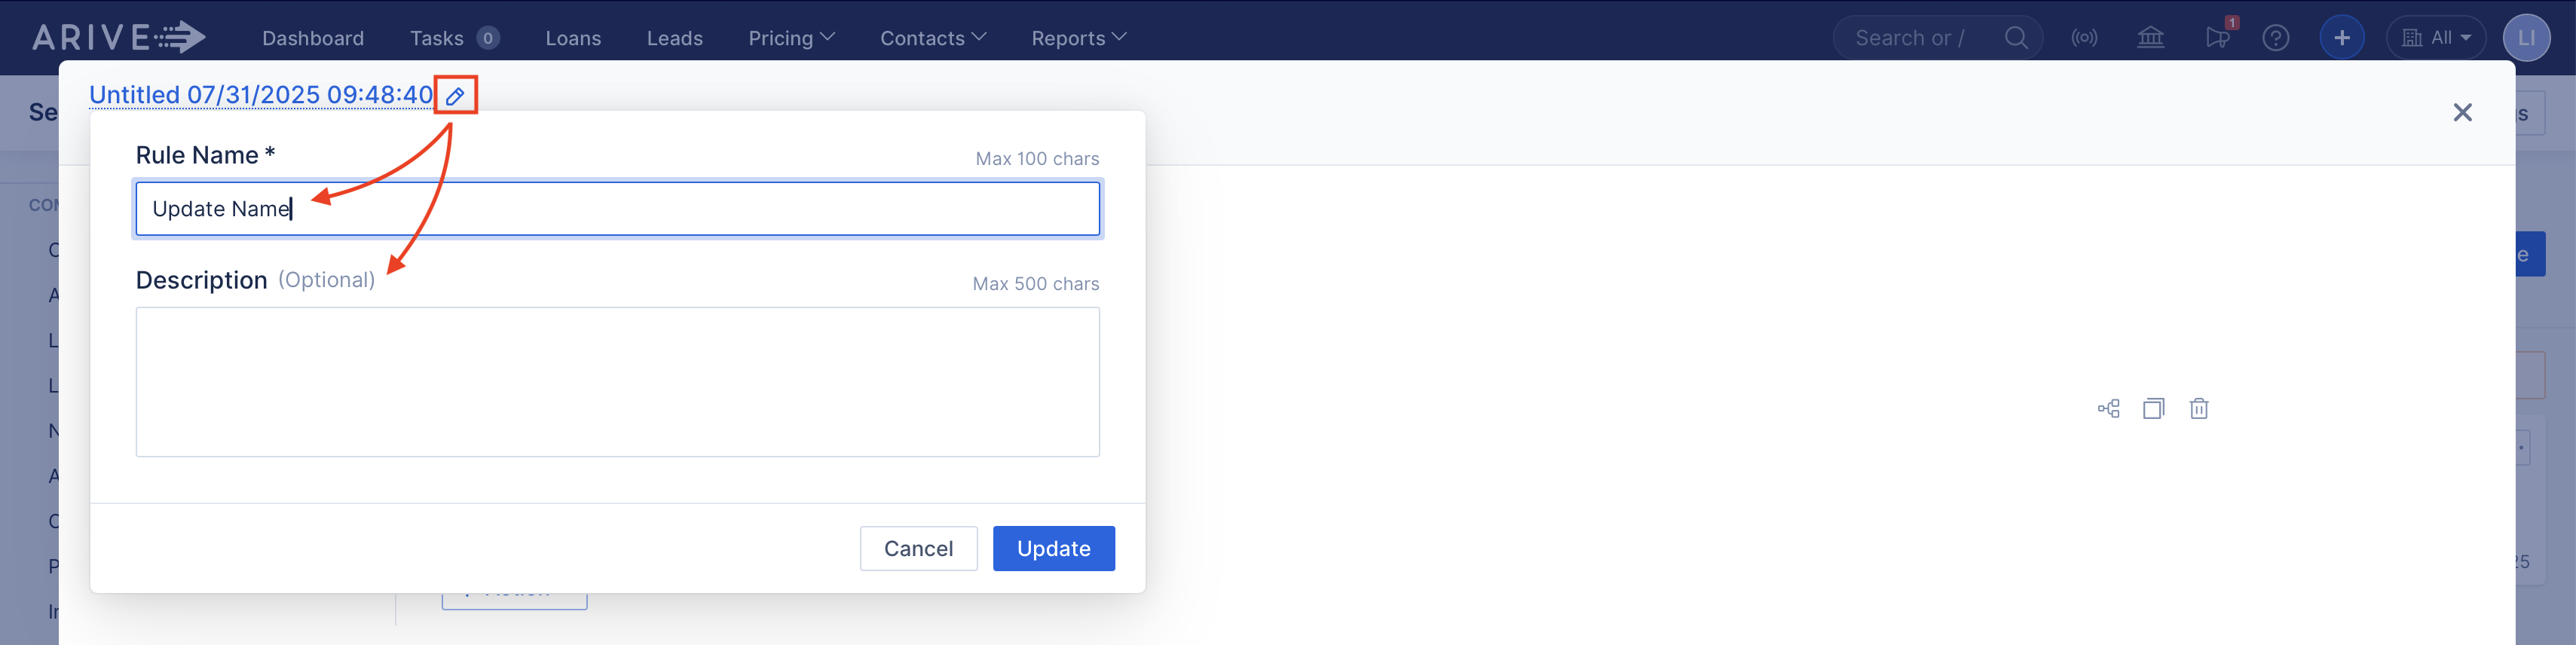
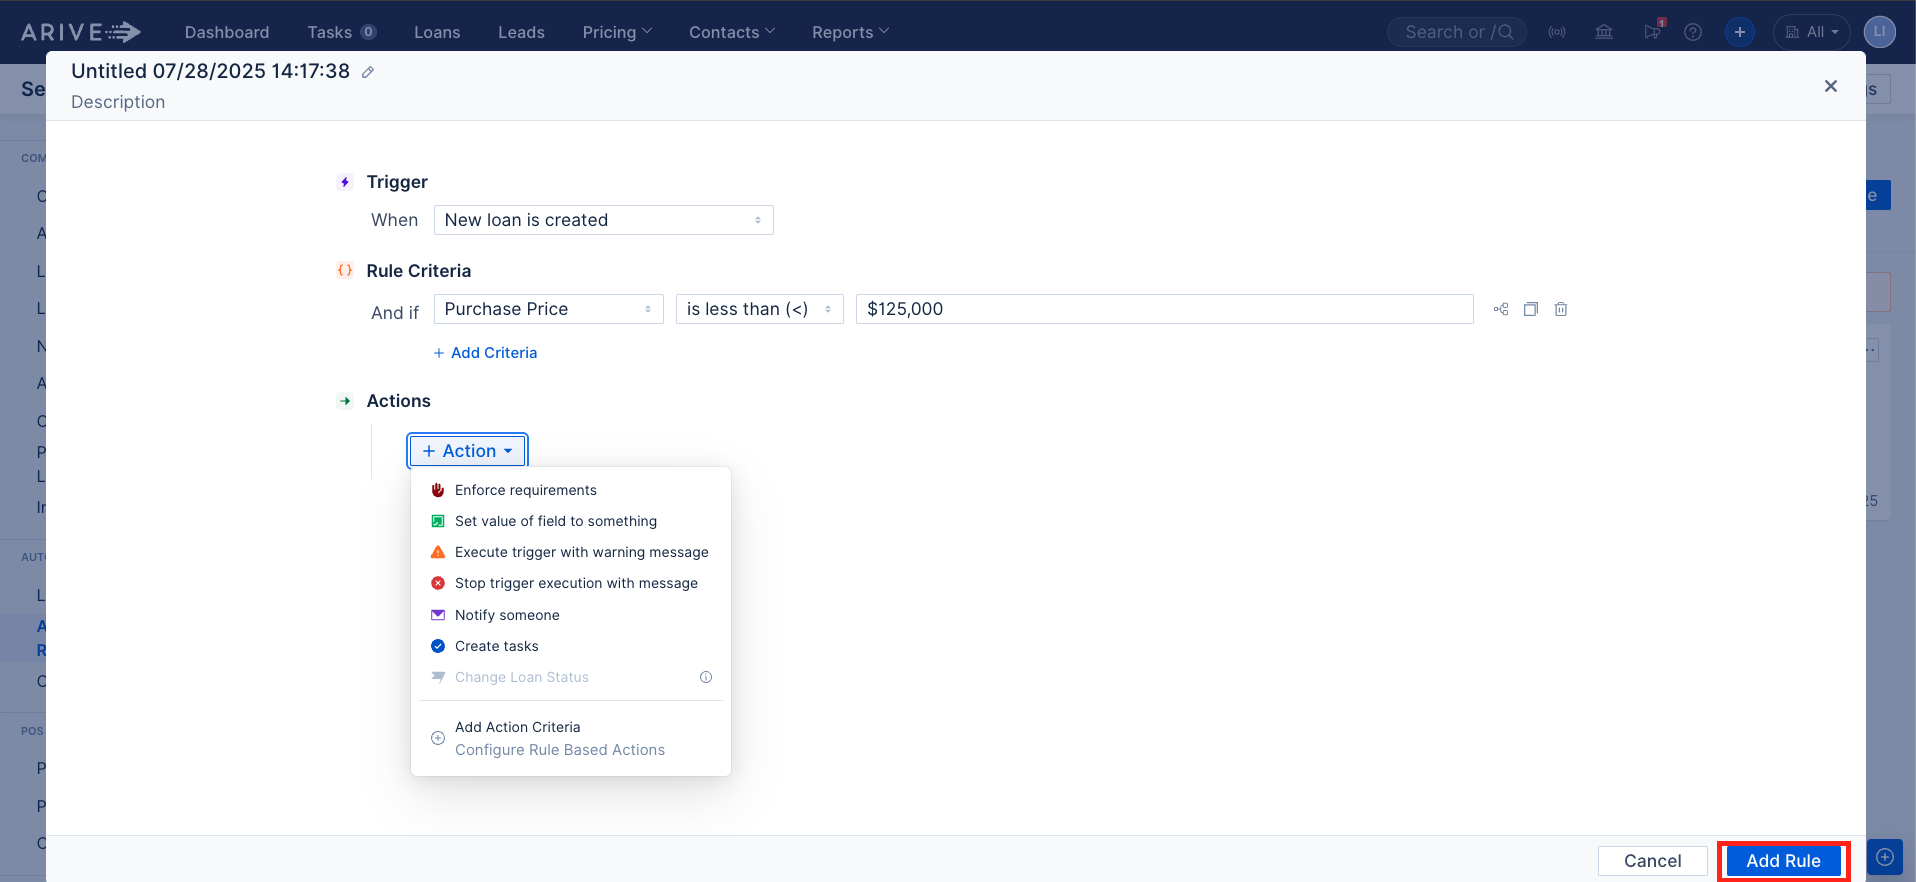
- Click + New Rule.

- Give your rule a name and description to keep things organized (optional).
- Select a Trigger (when the rule starts).

- Select + Add Criteria (optional conditions).

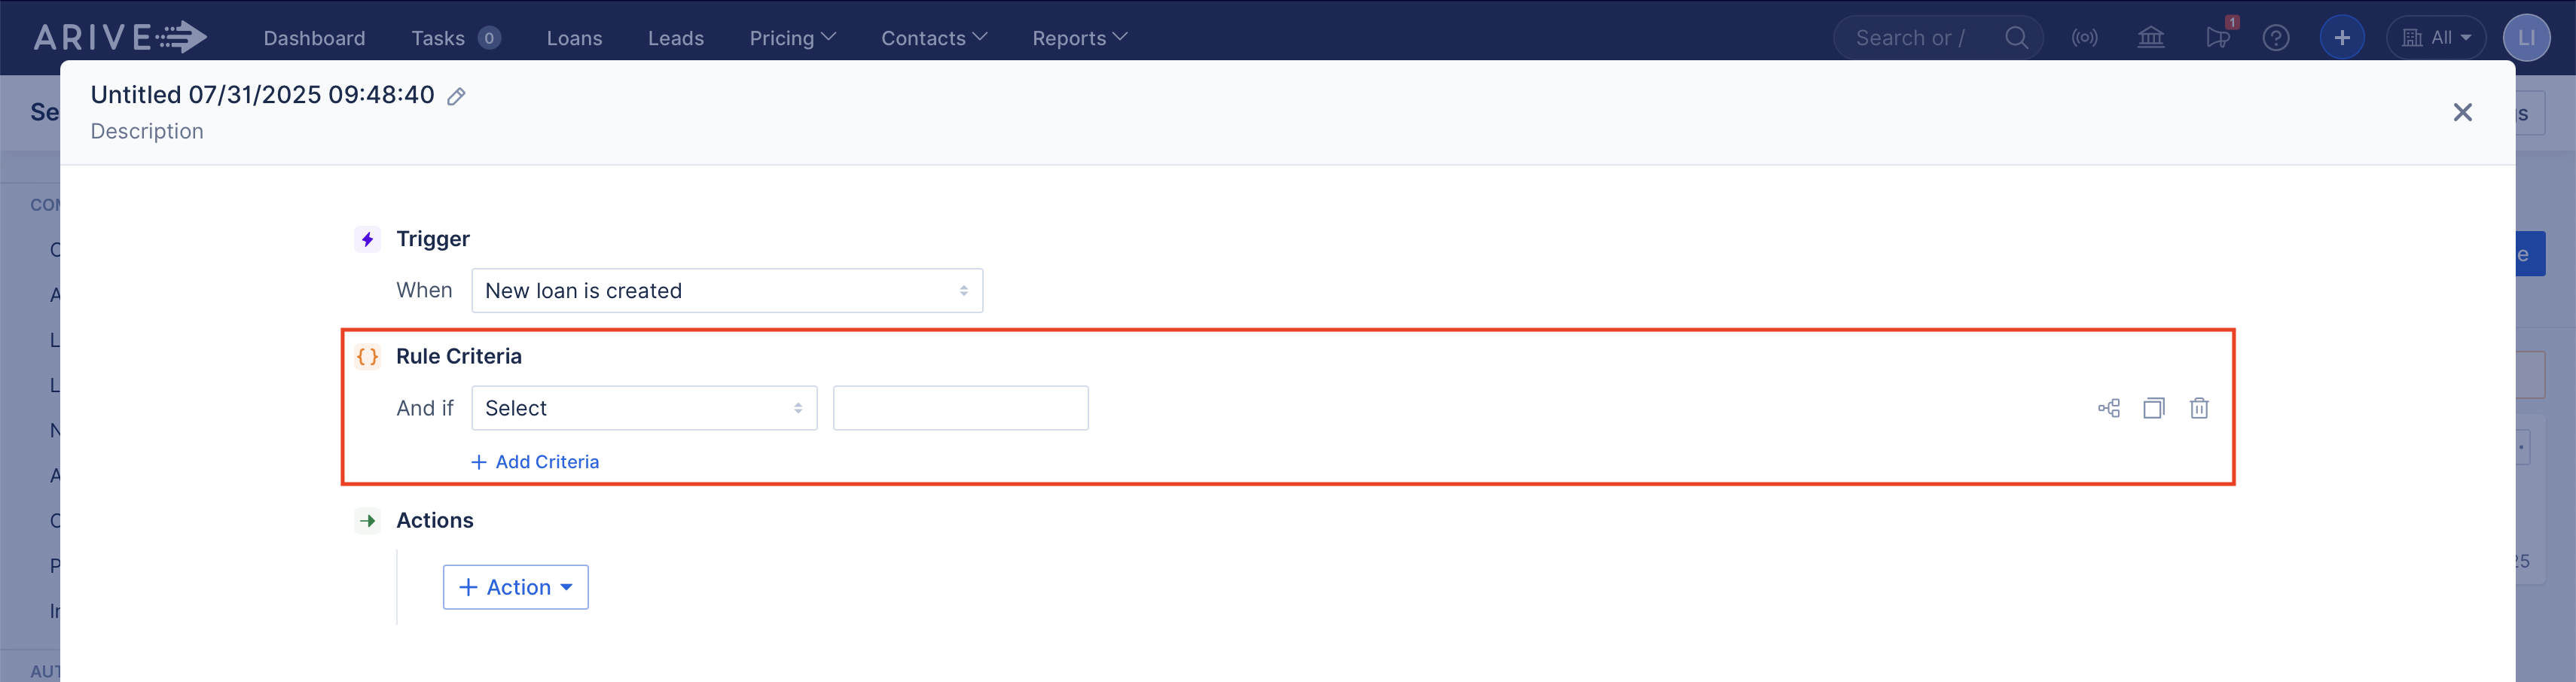
- Select an Action (what ARIVE will do).

- Click Add Rule.
- Test your rule on a sample loan to avoid conflicts.
Triggers (What Starts a Rule)
Triggers are events that cause an automation to run.

Available Triggers:
- New Loan Is Created – Fires when a loan is created either by the borrower in the POS or manually by a user in the LOS.
- Loan Status Changes – Fires when the loan status changes in general, or when it moves from specific statuses to others (e.g., from App Intake, Qualification, or Pre-Approved to Loan Setup, Disclosed, or Submitted to UW).


Tip: Select several statuses before and/or after the one you care about since users can skip steps.- Loan Date Changes – Fires when key loan dates are set, changed, or cleared.

- Subject Property Changes – Fires when Occupancy Type, Property Type, or Address changes.
- Property Types: Single Family, Condo, Cooperative, Manufactured, PUD, Townhouse, Vacant Lot/Land.
- Occupancy Types: Primary Residence, Second Home, Investment.

- Loan Team Changes – Fires when a user on the Loan Team with the selected role is assigned, removed, or changed.

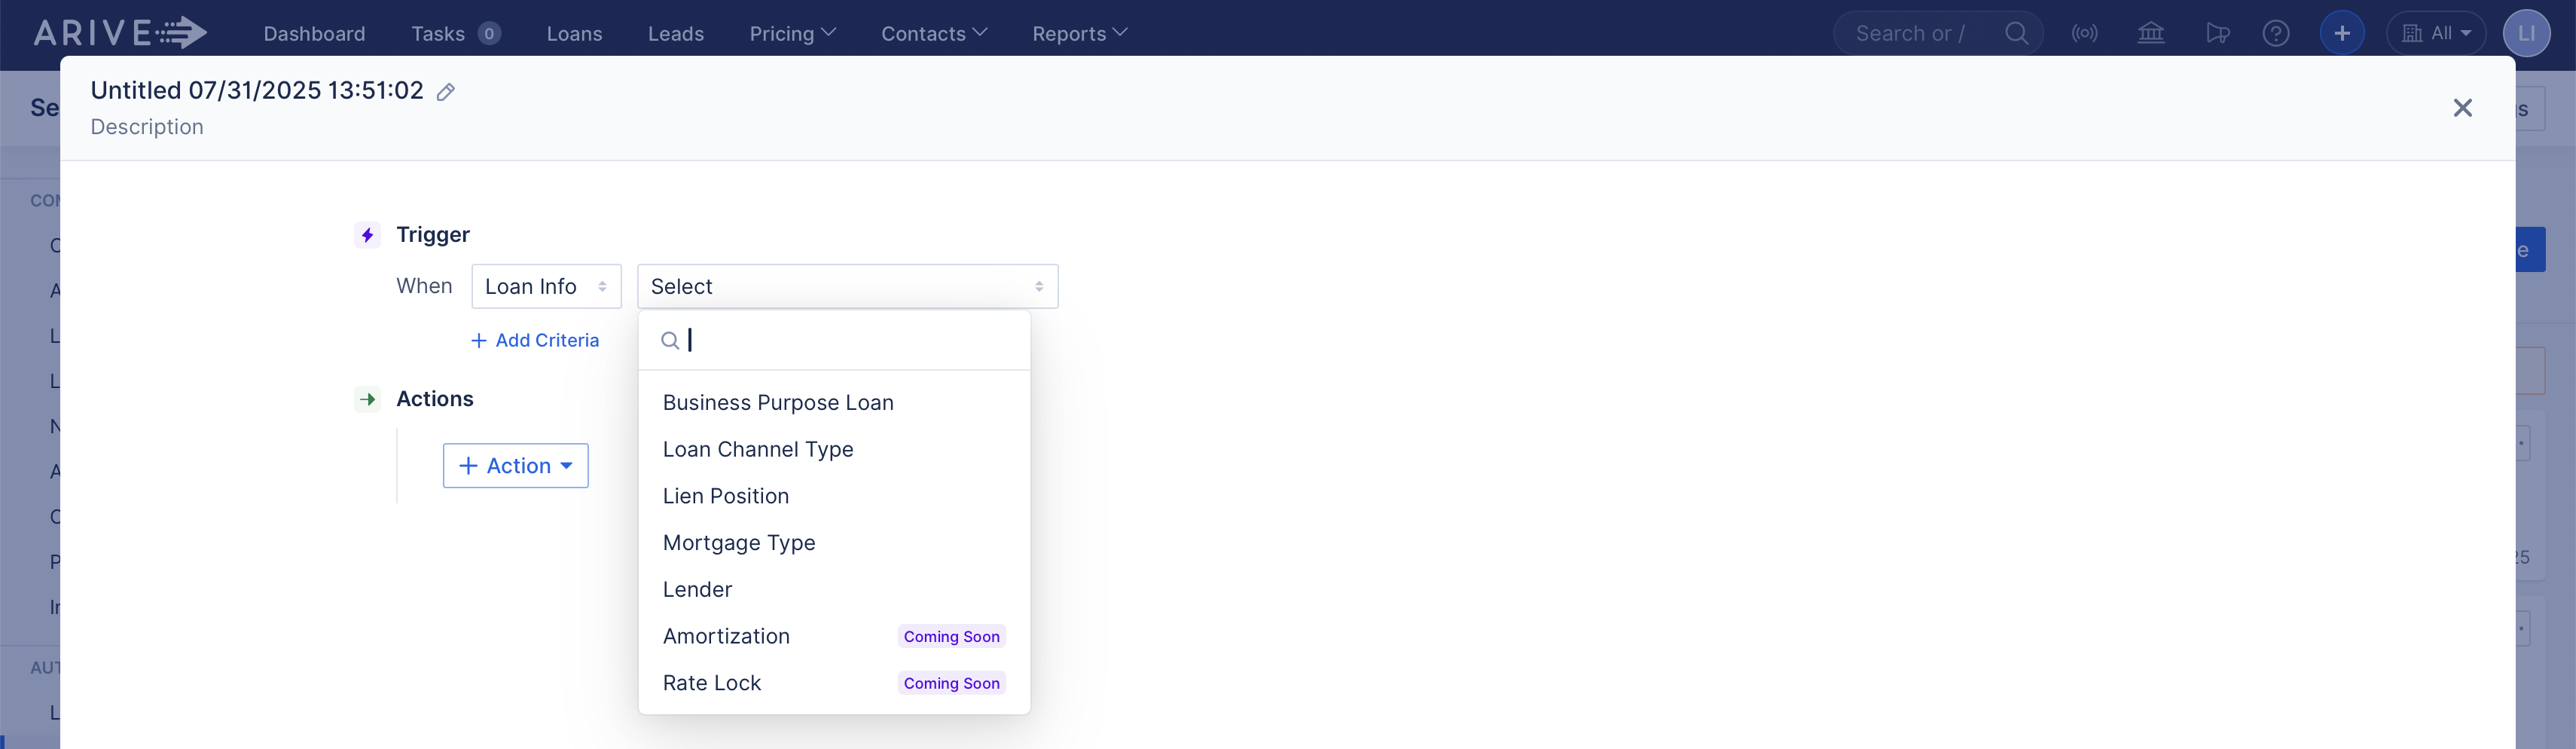
- Loan Info Changes – Fires when loan details like Loan Channel Type, Lien Position, Mortgage Type, or Business Purpose Loan are updated.
- Loan Tracker Status Changes – Fires when tracking actions start (e.g., ITP Status, Title Order, Flood Cert, Appraisal Ordered, CD Status).

- Loan Action – Fires on in-platform actions like ordering credit or generating disclosures.

Custom Field Changes – Fires when a custom field is updated.

Borrower Info Changes – Fires when borrowers are added or removed, or when borrower emails change.

Task Status Changes – Fires when a task status changes (e.g., Open → Done).

Automation Criteria (Filters)
Criteria help you narrow down which loans the rule should apply to — so automations only trigger when certain conditions are met.
Criteria help control when your rule should run. You can:
Use simple filters (like Loan Status = Pre-Approved)
Combine multiple filters using AND
Build advanced logic using nested OR groups
Basic Criteria (“And if”)
When you click + Add Criteria, ARIVE links each one using AND logic by default. That means all conditions must be true for the rule to run.Example:
Loan Status = Pre-Approved
Channel = Broker
FICO Score > 700
All conditions must be true. If even one of those is false, the rule won’t run.
Nested Conditions (OR Logic)
Click the bracket icon next to a condition to group conditions using OR logic. With OR, only one condition in the group needs to be true.Example:
Loan Officer is licensed in LA
OROccupancy = Investment
This rule runs if either of the two conditions is true.
Multiple Values in the Same Condition
If you select more than one value in the same condition (e.g., Loan Officer in Jane Doe, John Smith), ARIVE treats it as OR — only one of the values needs to match.
When you add separate conditions, they default to AND unless you group them with OR.
Tip: Always test complex logic using a sample loan.


Actions (What ARIVE Will Do)
Once a trigger fires (and any criteria are met), ARIVE performs the actions you've set. You can stack multiple actions in a single rule. Some actions apply to the whole rule, while others can be narrowed further with action-specific criteria.
Use actions to automate communication, enforce data, assign tasks, and move the loan forward.
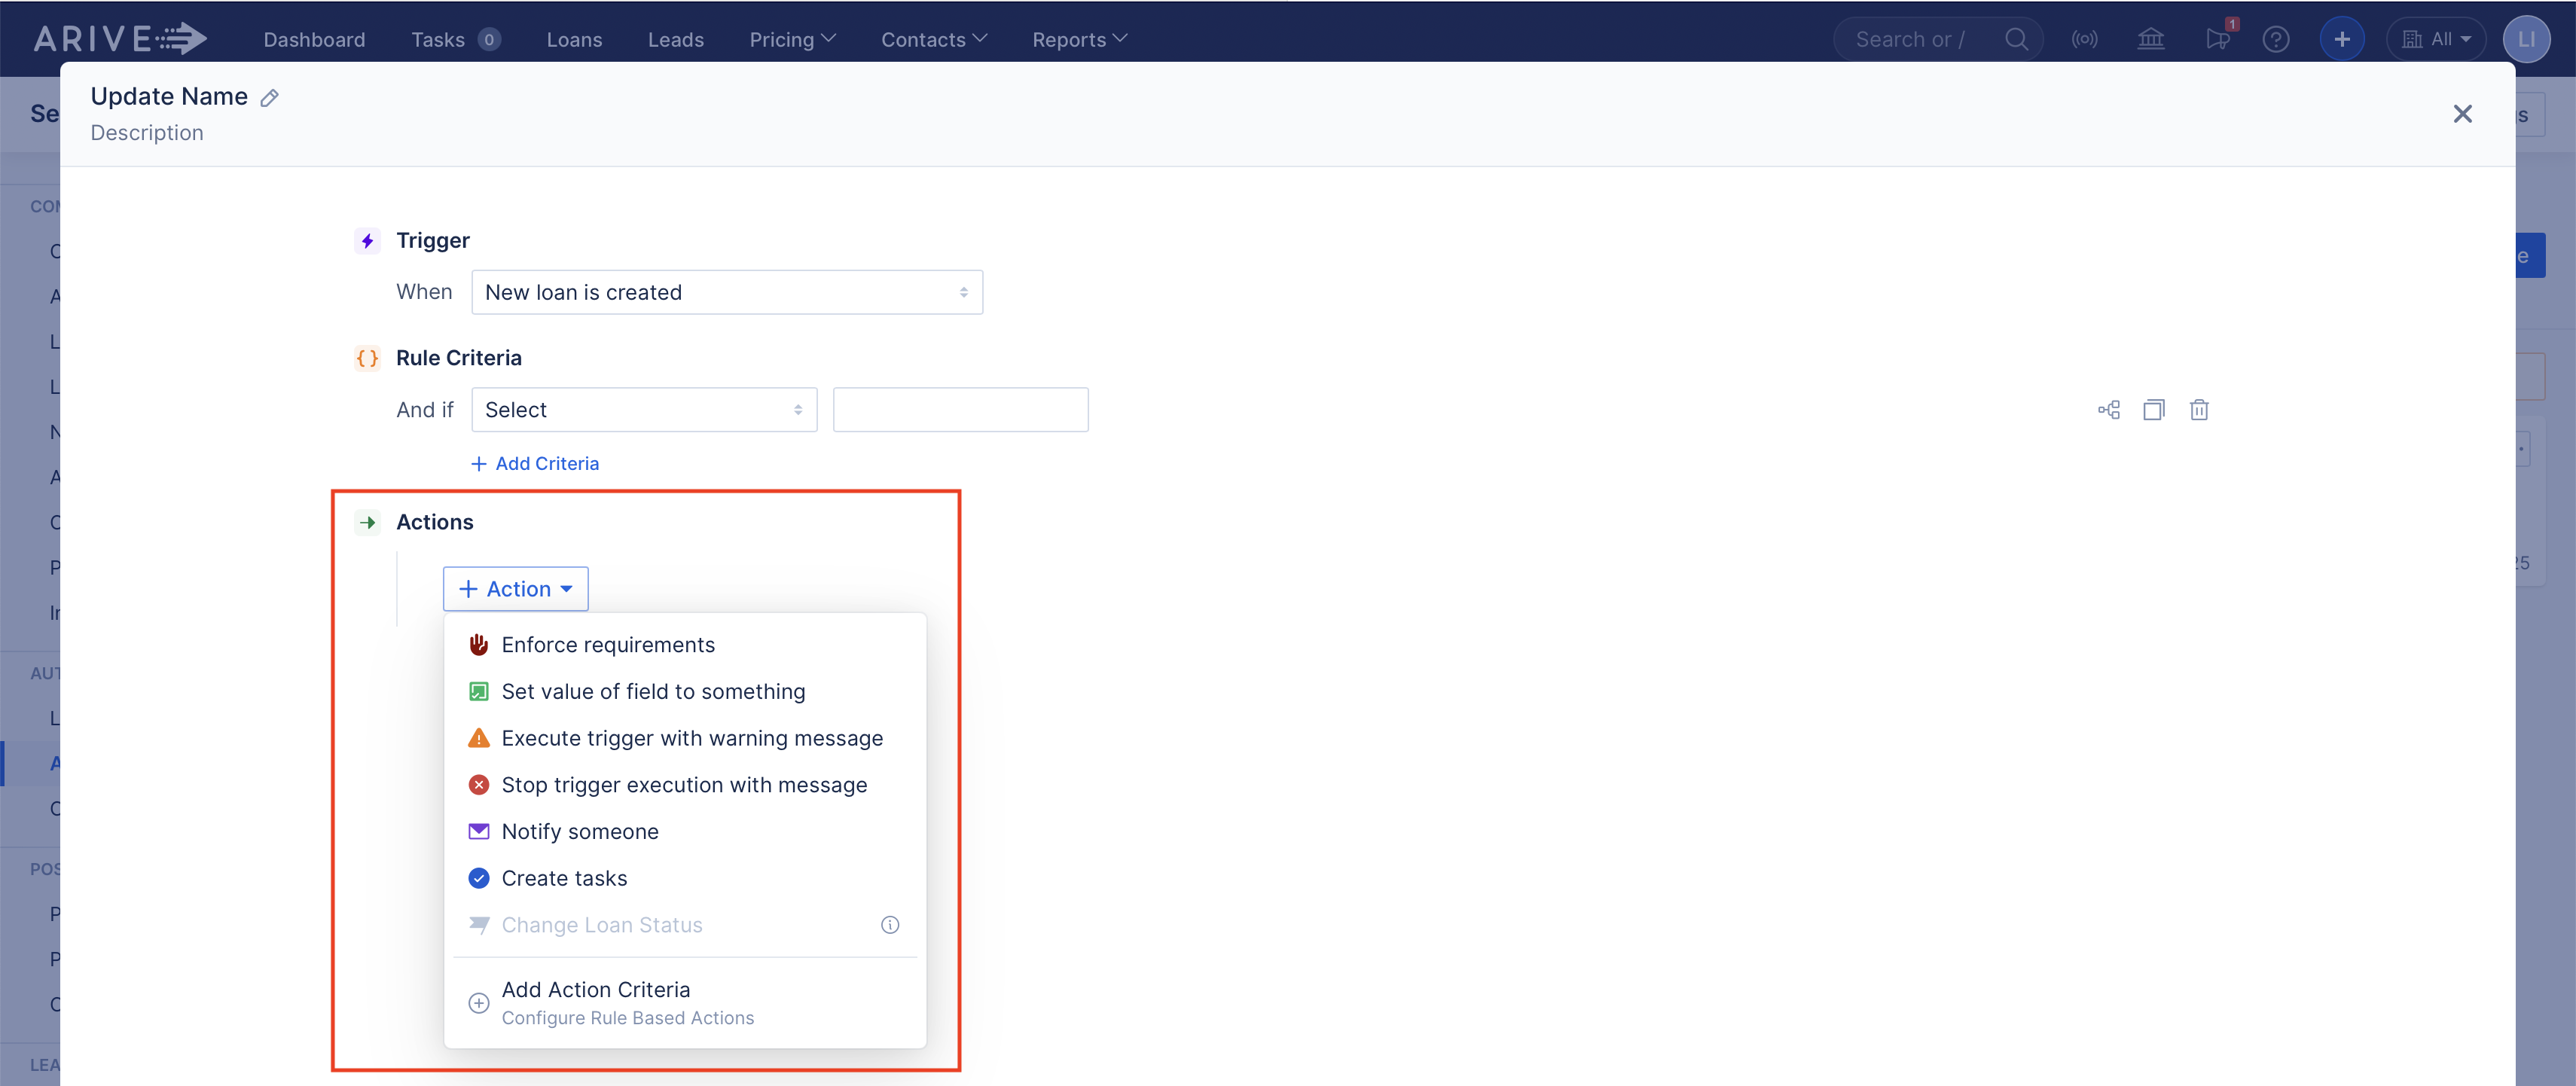
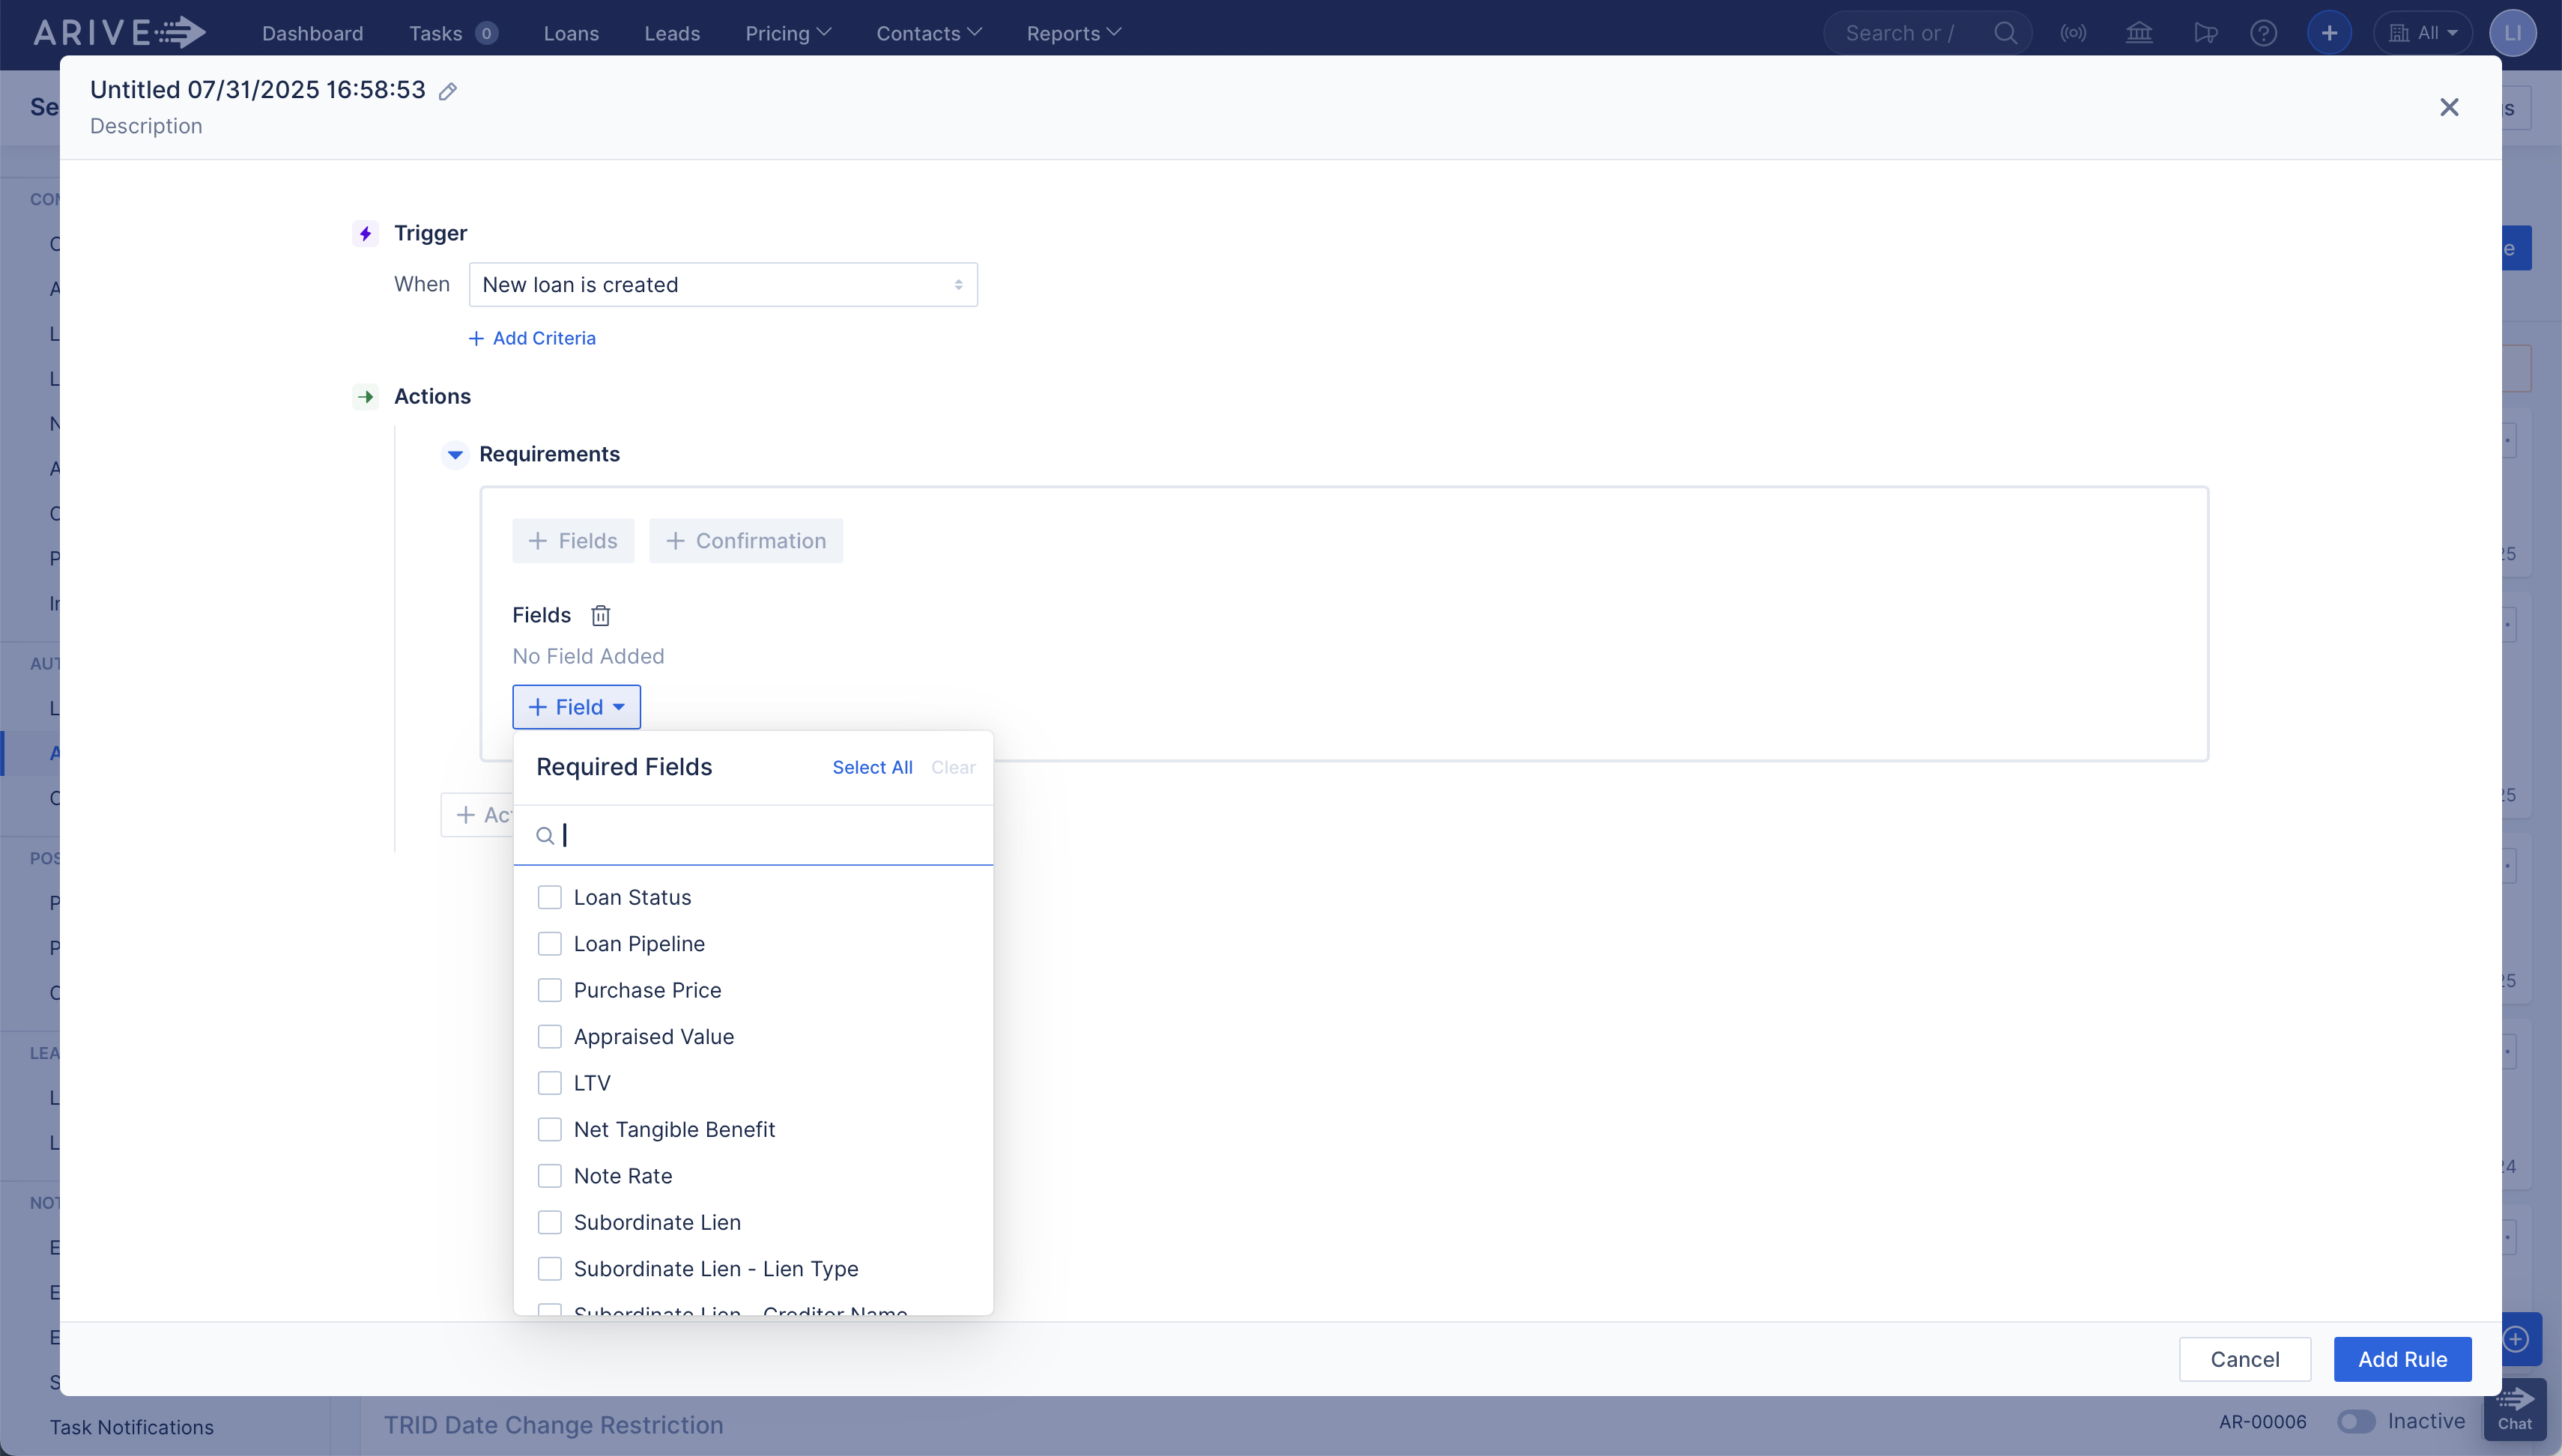
Enforce Required Fields – Blocks the user until all required fields are completed.
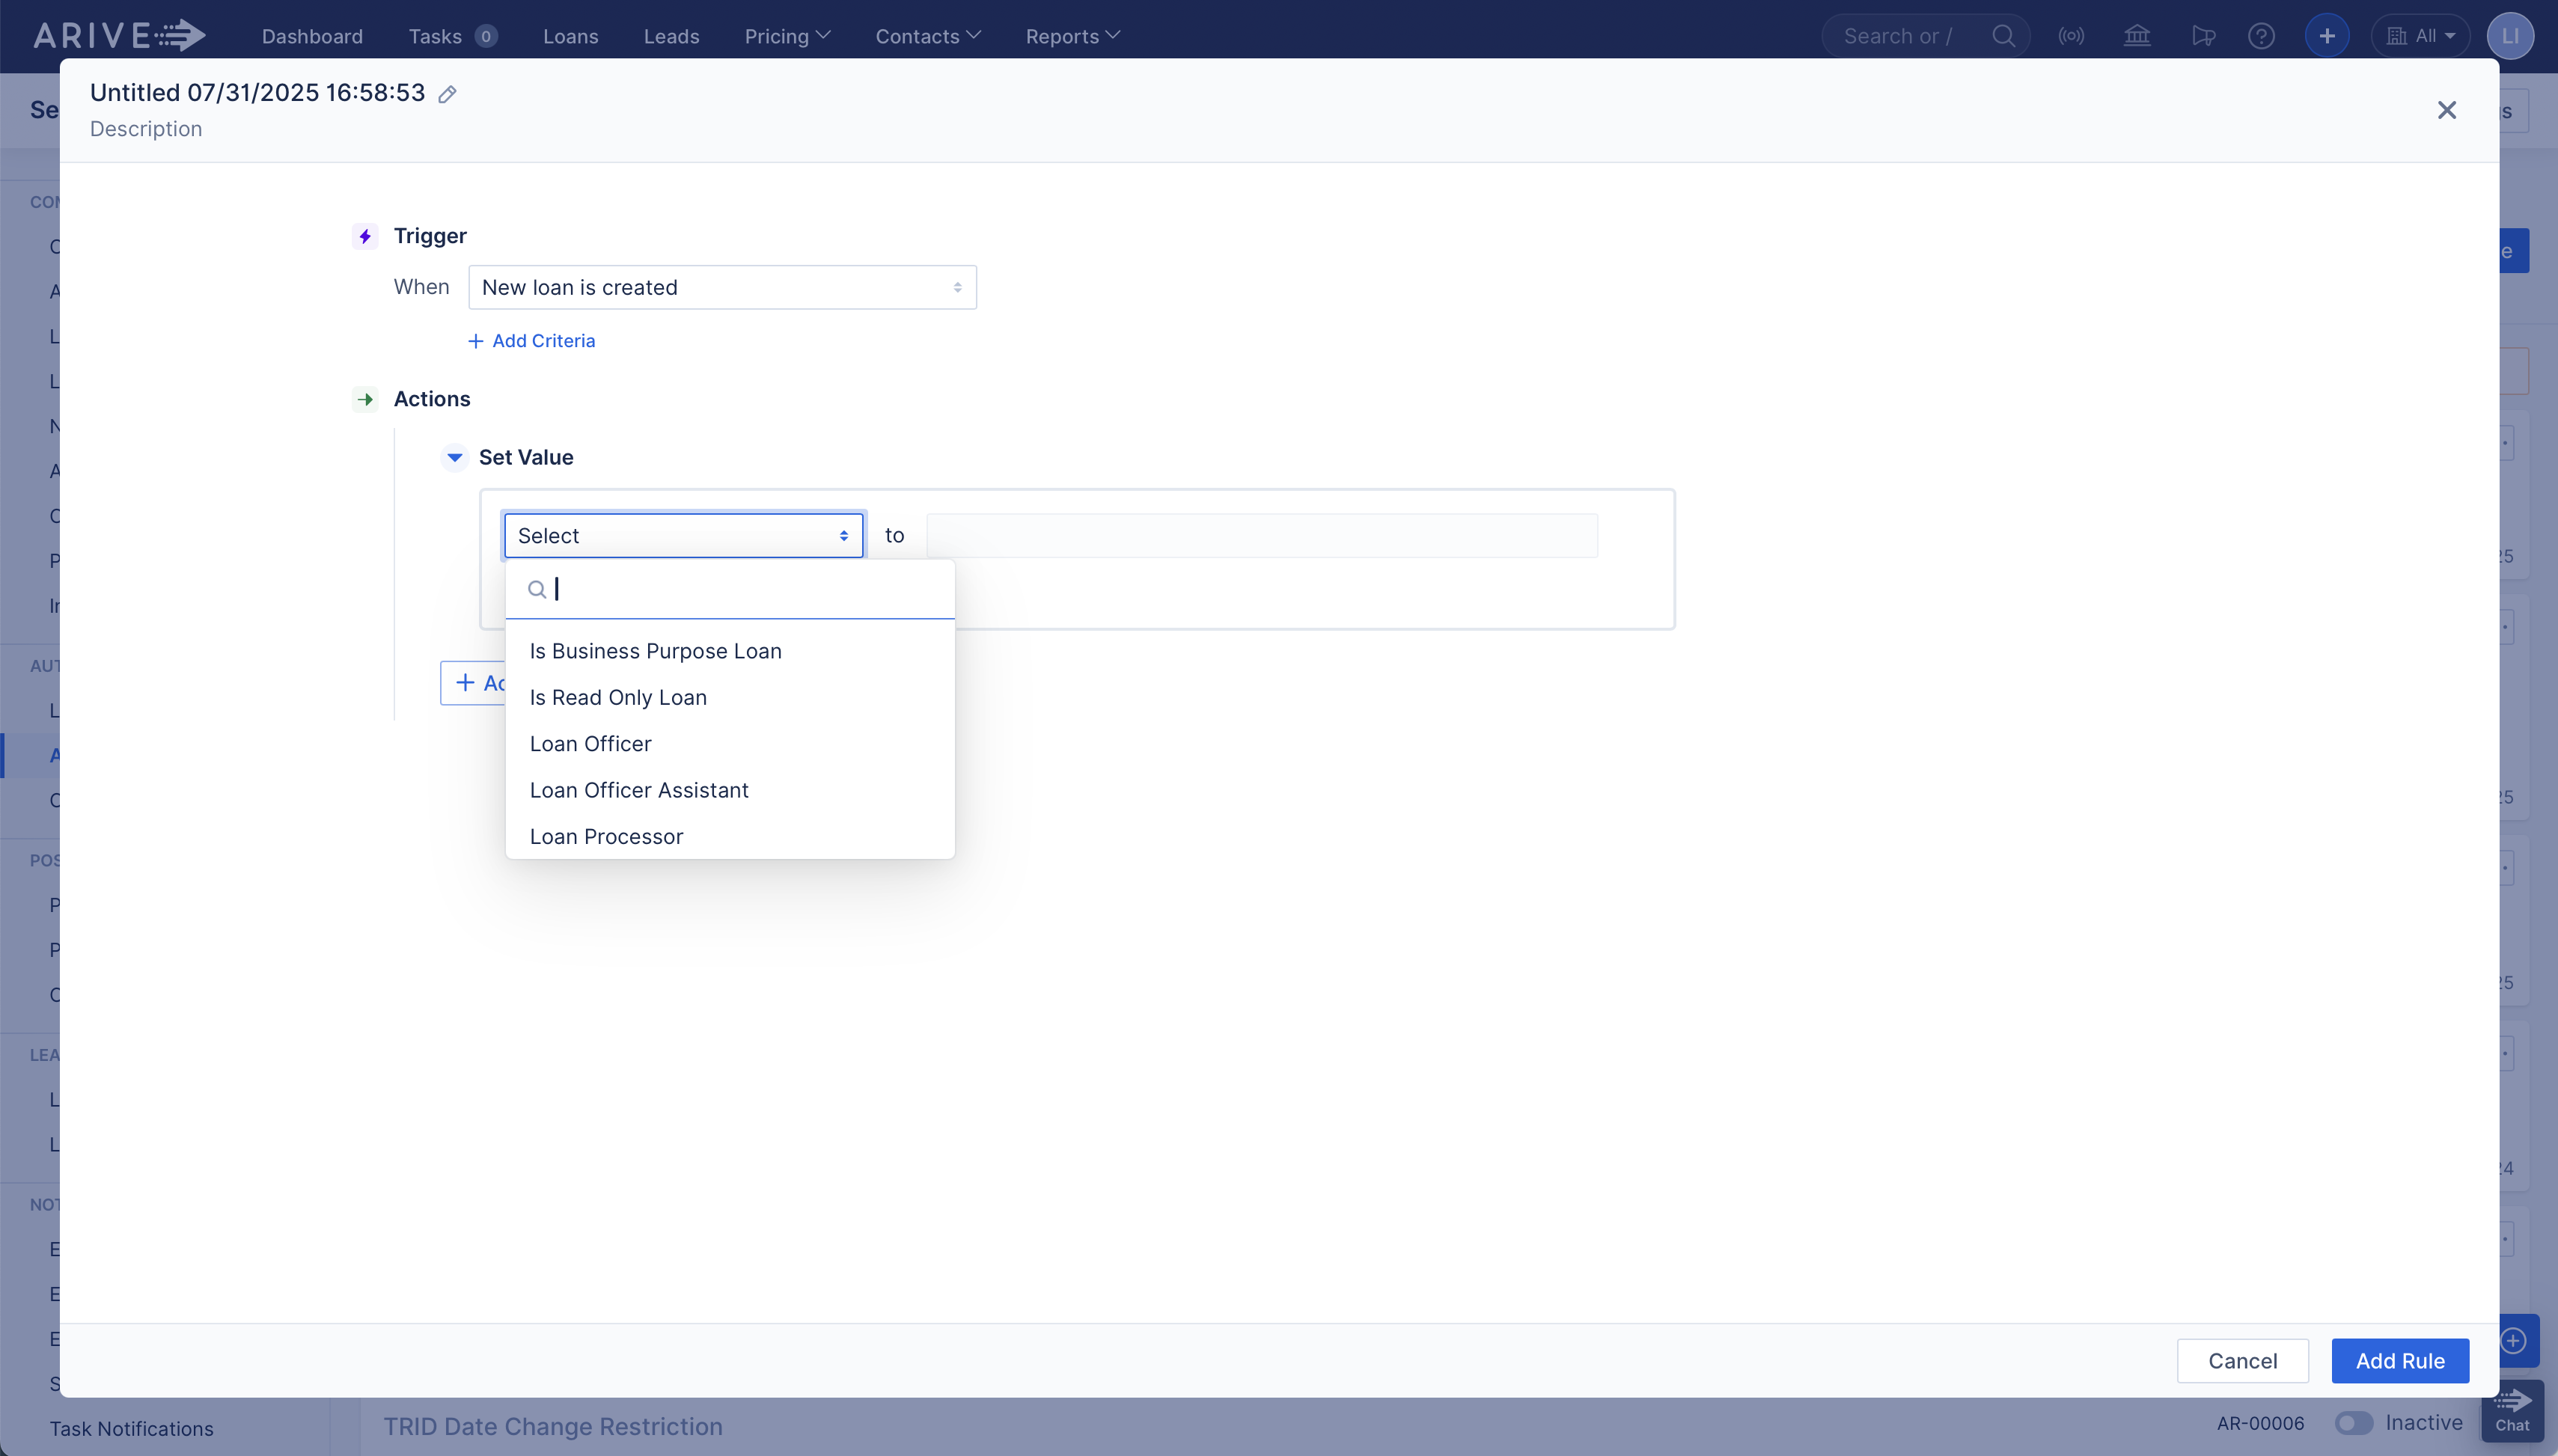
Set Value of Field – Automatically sets a field value (e.g., auto-select "Business Purpose Loan").
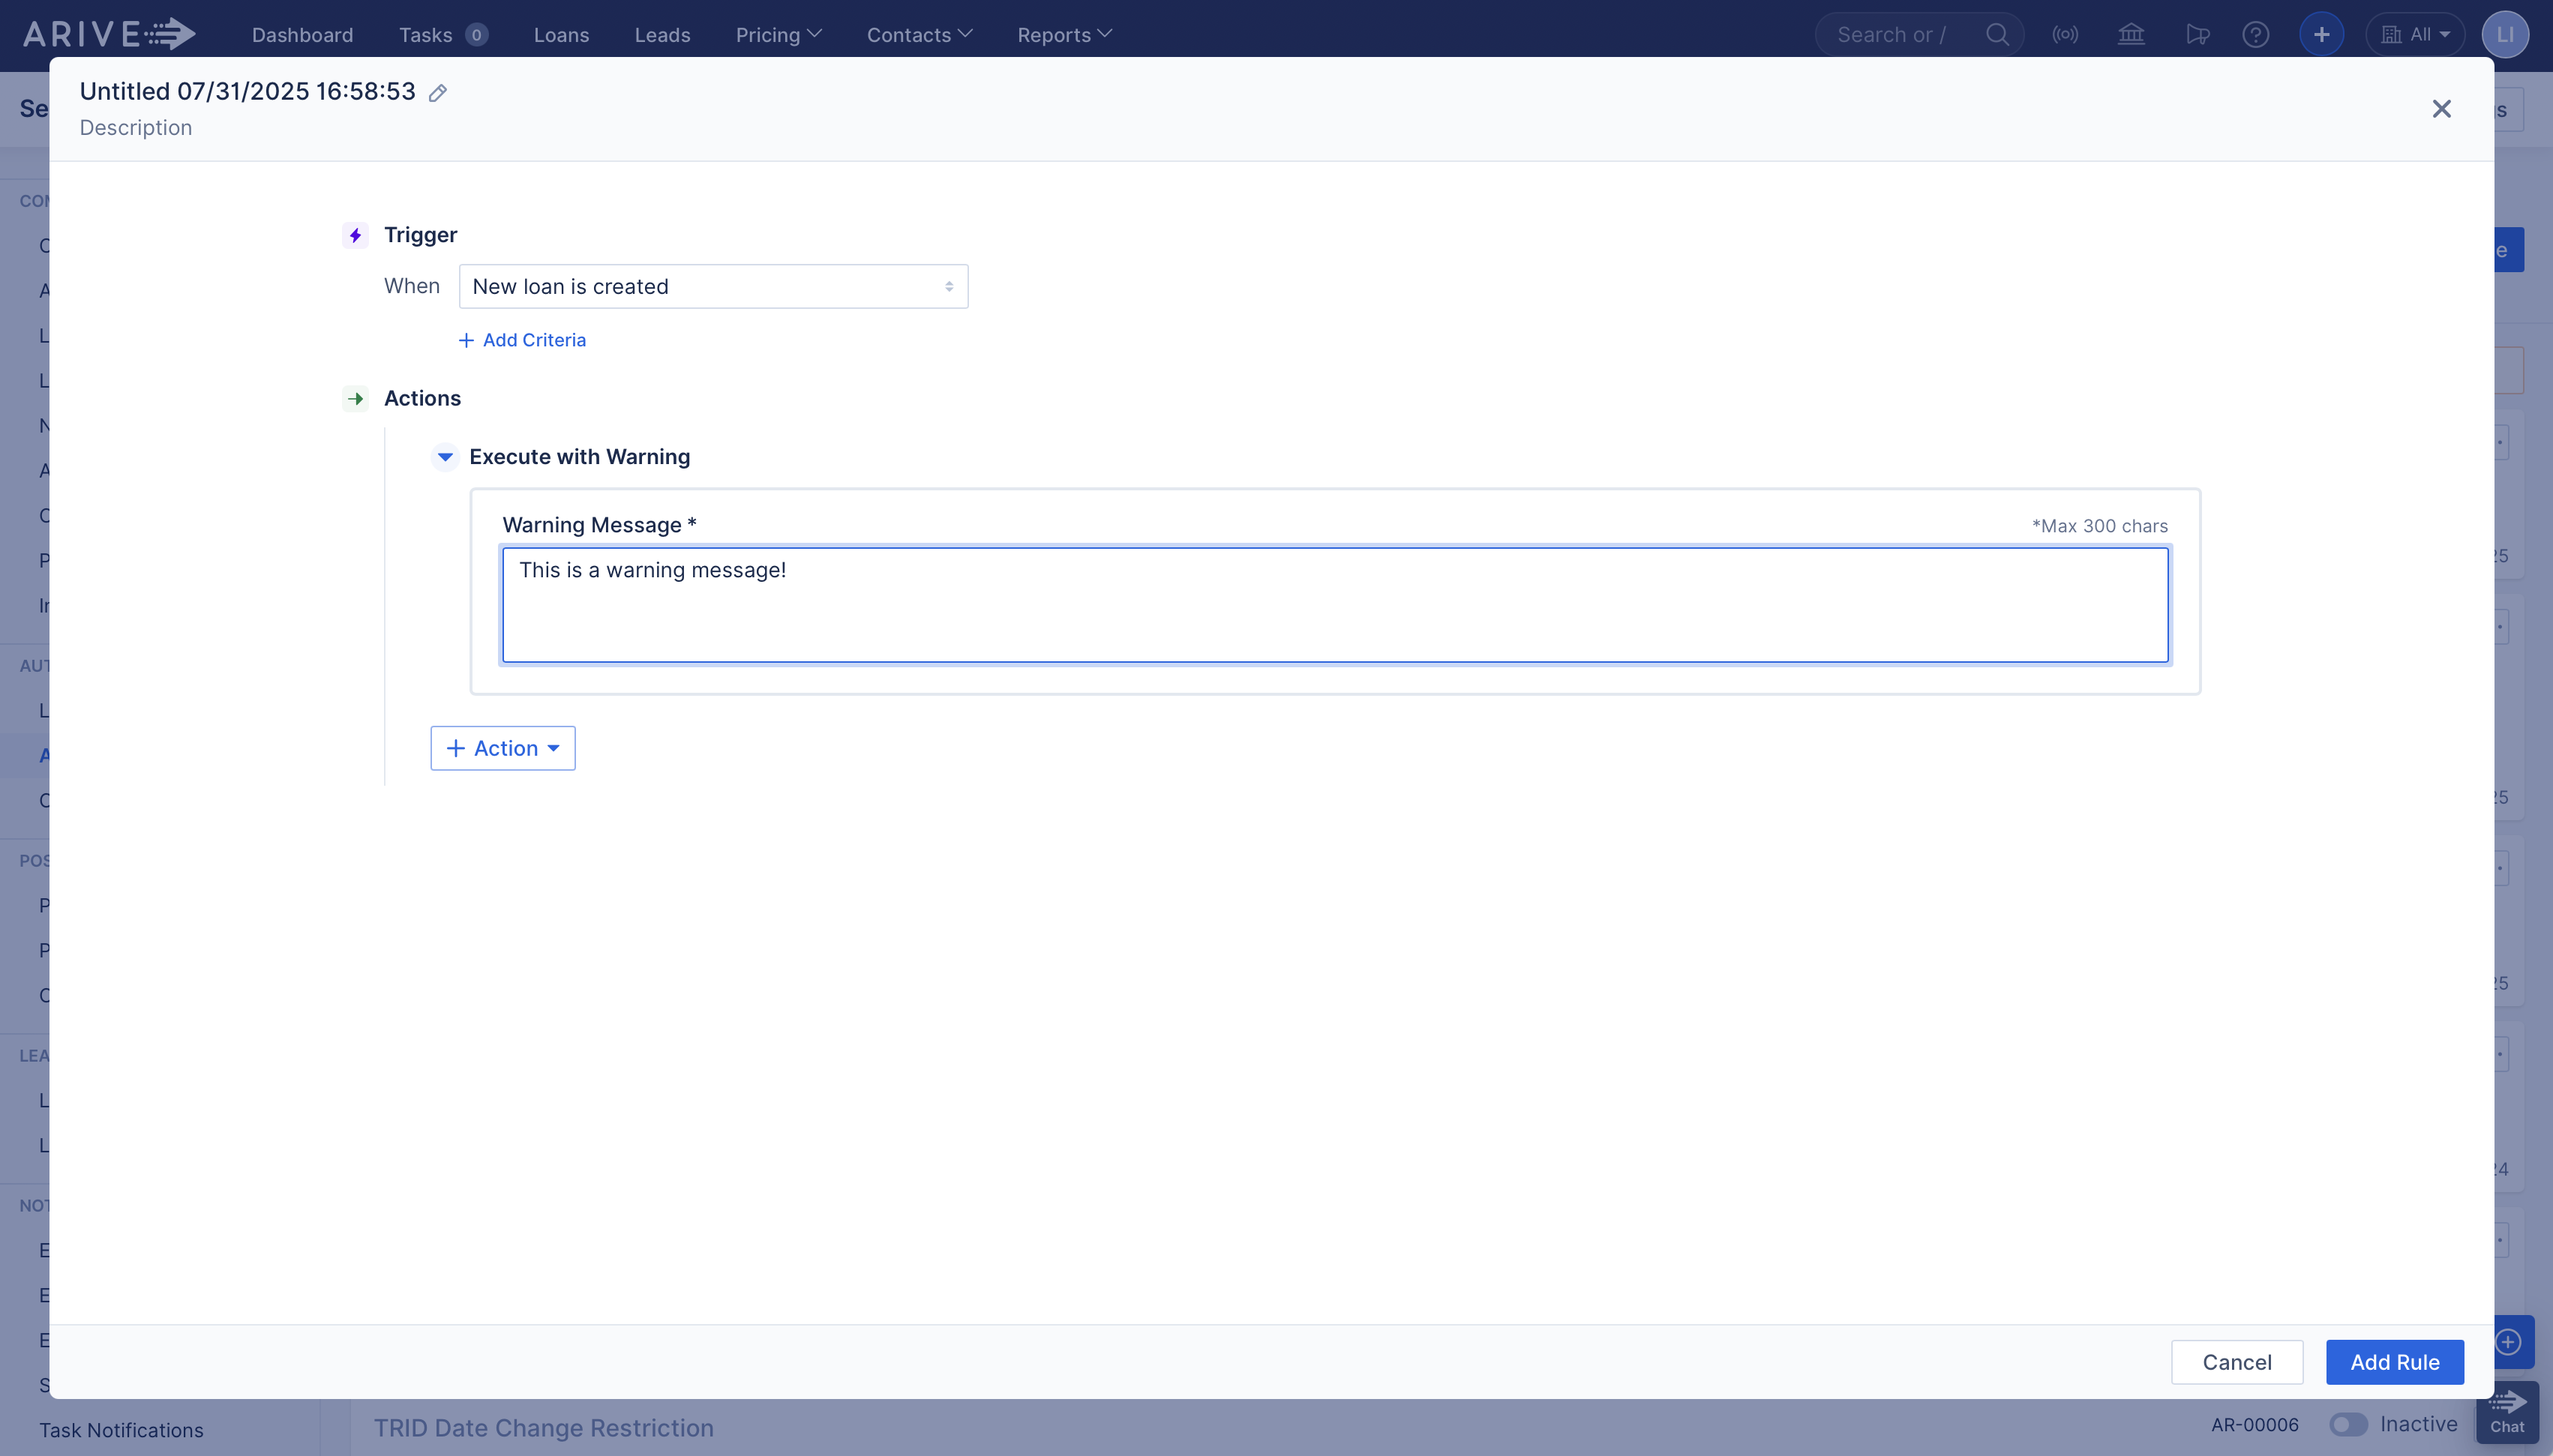
Warning Message – Shows a pop-up warning but lets the user proceed.
Stop With Message – Displays an error message and prevents further progress until corrected.

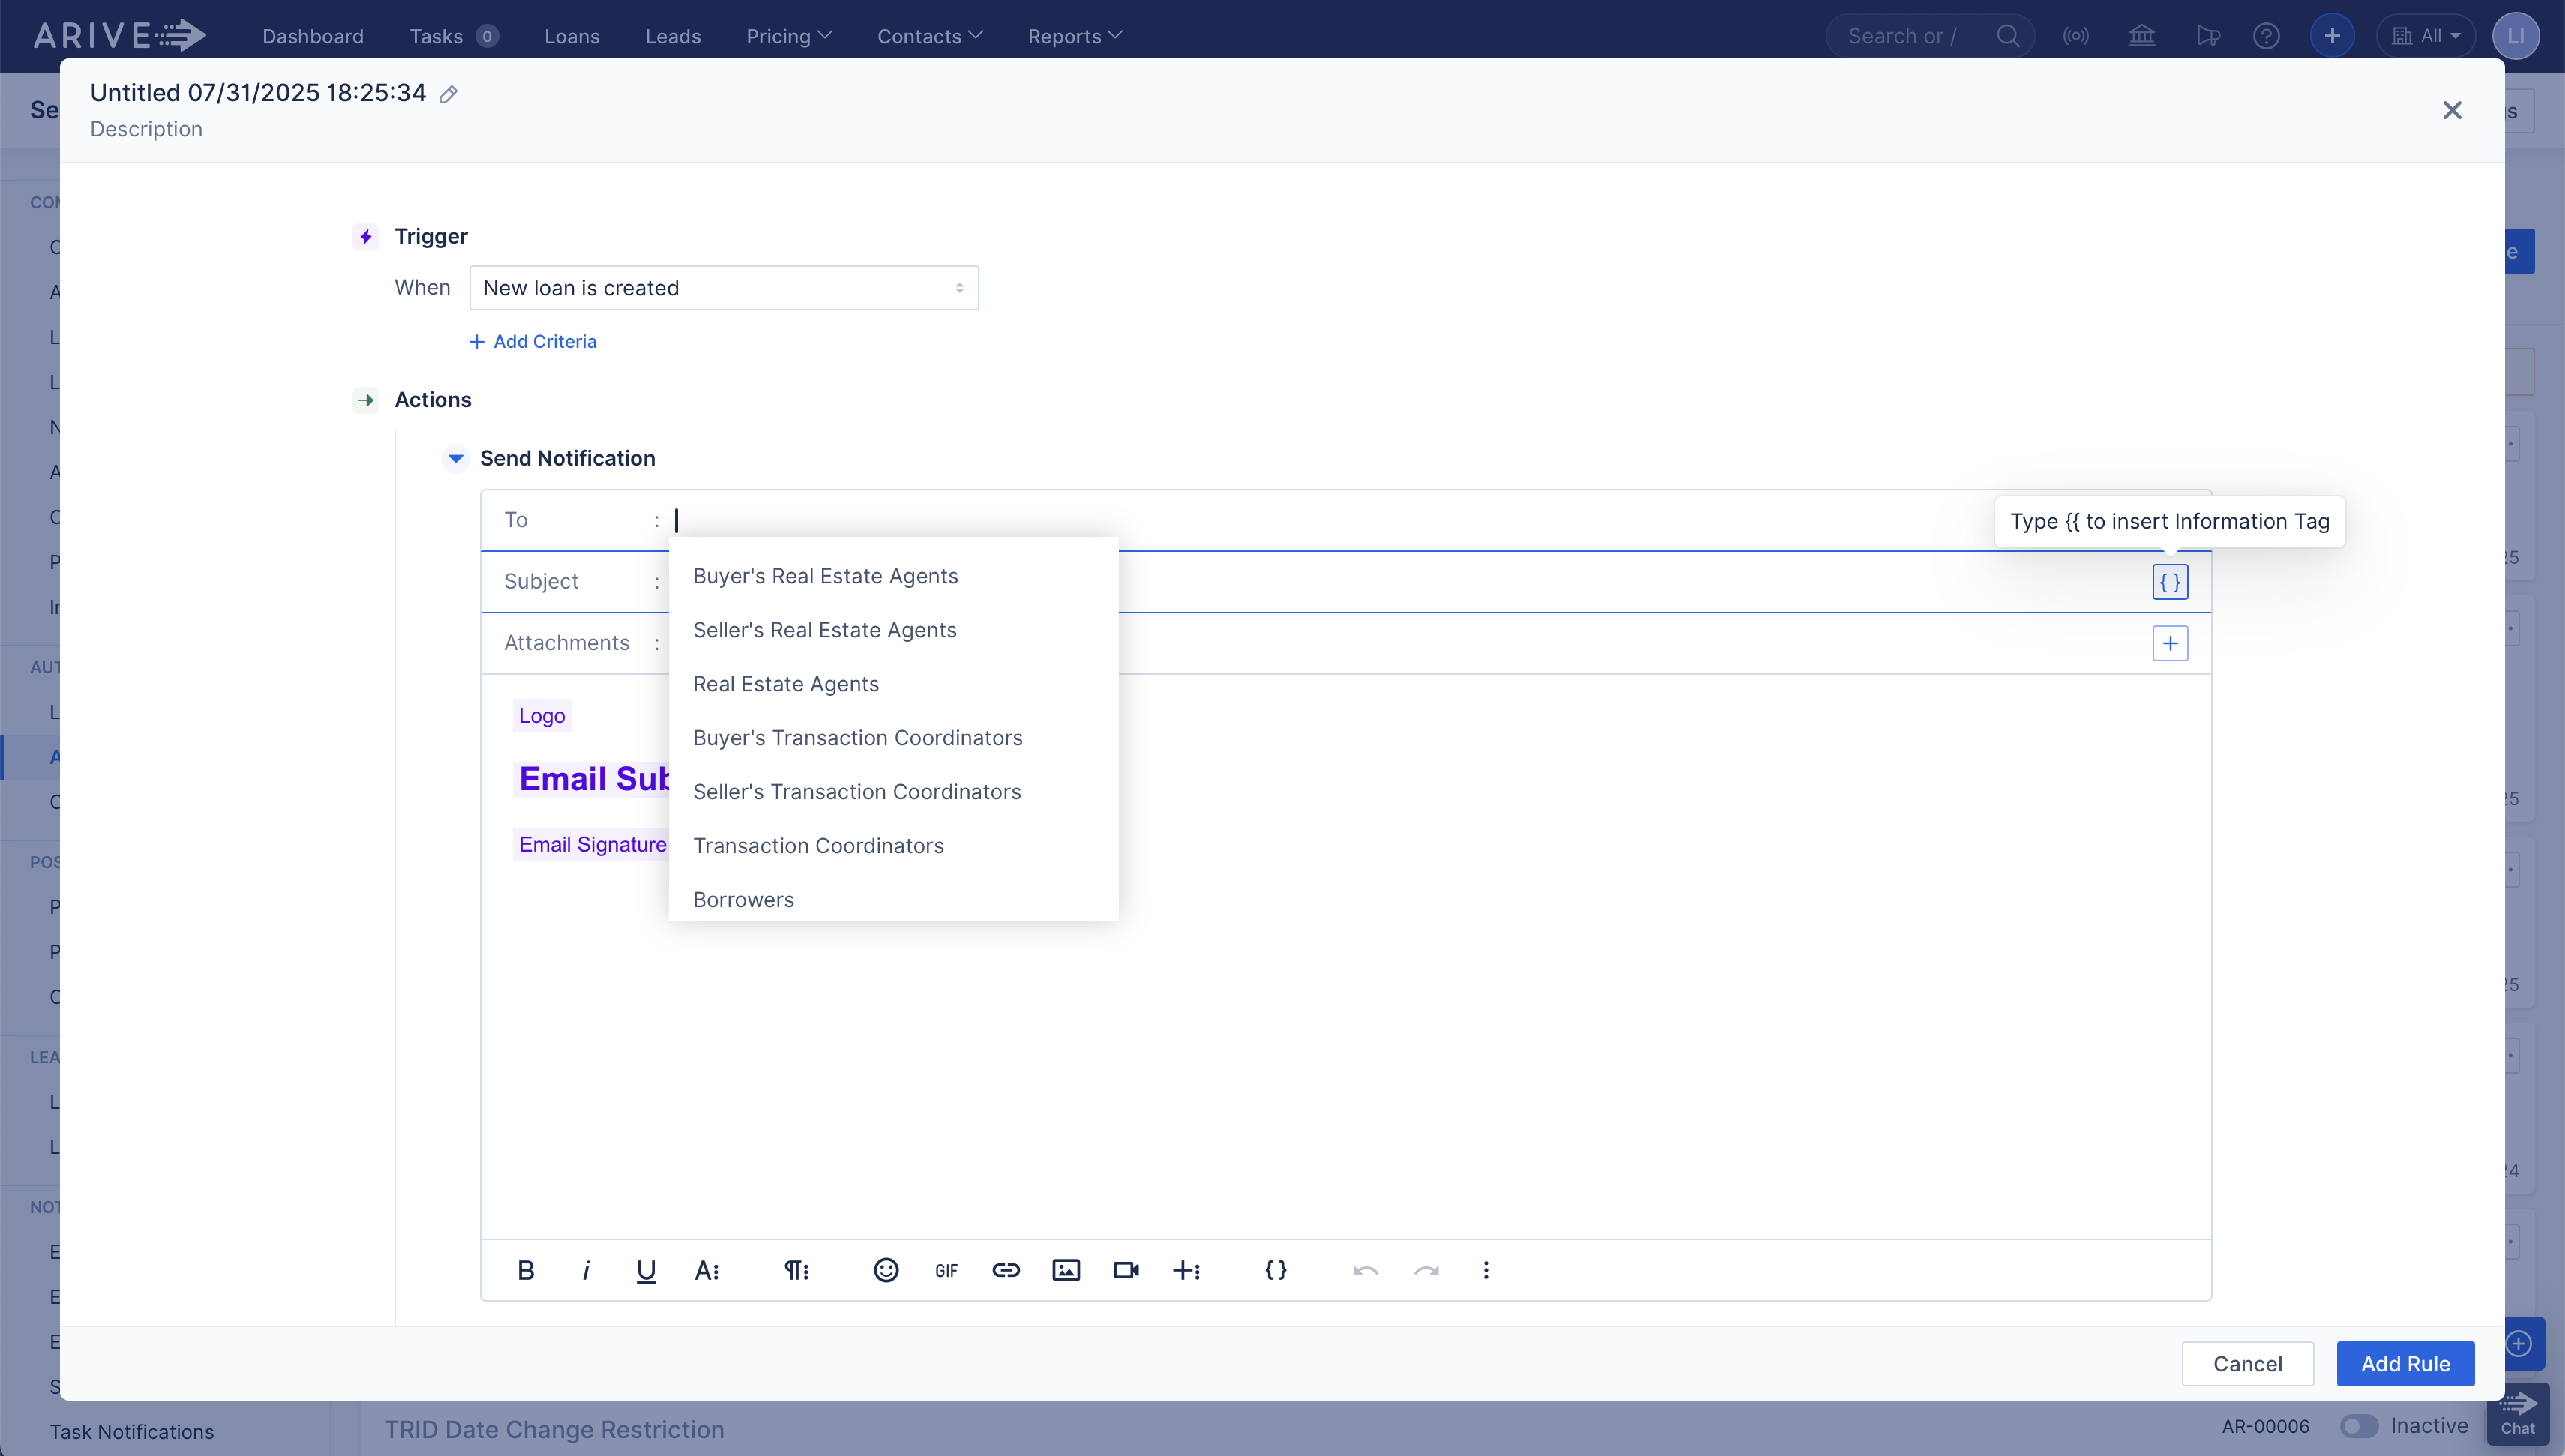
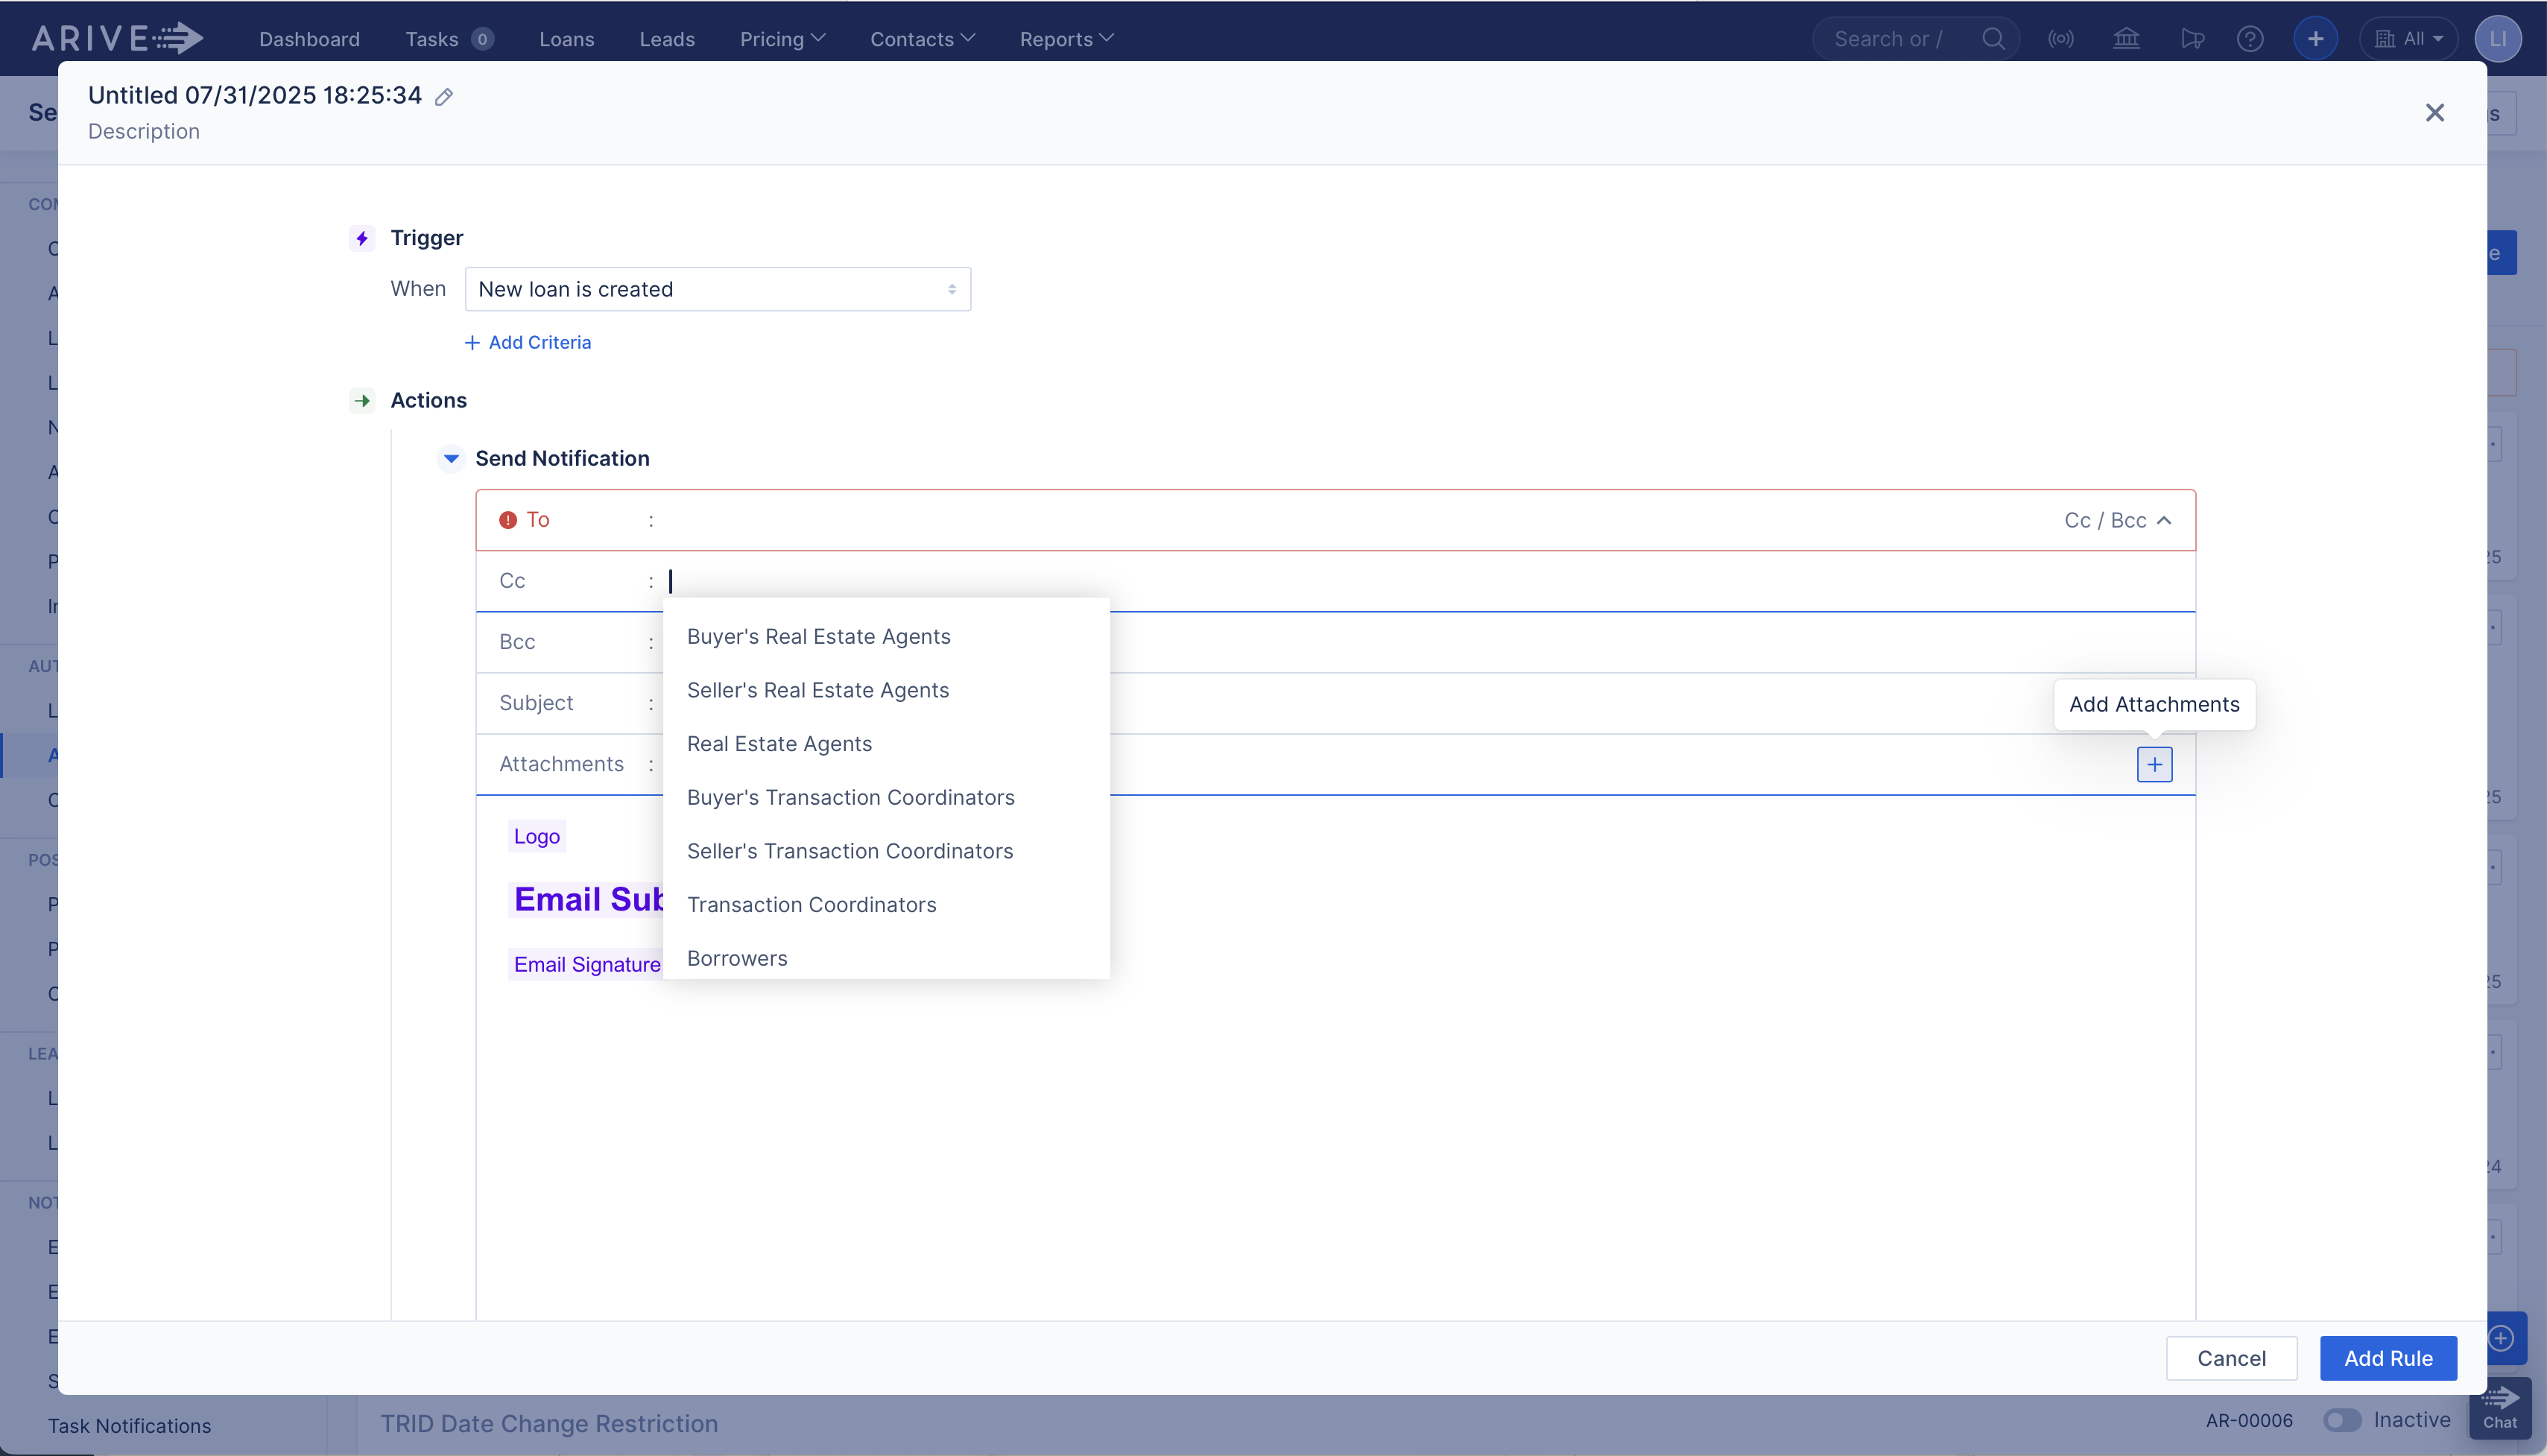
Notify Someone – Sends an email or notification to specific people or teams.
Create Tasks – Automatically creates tasks (can be linked to task templates).

See: Task Management (HOT-25570) [ARIVE Release Notes - v2025.7.0.0]
Change Loan Status – Automatically updates the loan status when paired with a Task Status Changes trigger.

Add Action Criteria – Add extra conditions that must be met for the action to run (e.g., only send email if loan status = Pre-Approved).

FAQs
Q: Can two automations run at the same time?
Yes, but ensure they don’t conflict (e.g., sending duplicate emails or updating the same field).
Q: Can I use multiple triggers in one automation?
No. Each automation starts with a single trigger but can include multiple actions.
Best Practices
Always test each rule on a sample loan.
Use clear names (e.g., Send Processor Notification – Appraisal Ordered).
Avoid overlapping rules for the same trigger.
Real-World Examples
- Example 1: When loan status changes to "Disclosed," ARIVE automatically sends an email notification to the Processor.
- Example 2: When "Appraisal Delivery Date" is set, ARIVE triggers a task for the Loan Officer to review the appraisal.
- Example 3: When a task like "Send Closing Package" is marked as Done, ARIVE updates the loan status to "Docs Out."
See:
Task Automation
Task Management (HOT-25570) [ARIVE Release Notes - v2025.7.0.0]
Task Pipeline