Learn how to update loan milestone statuses, move loans between pipeline categories, and complete required fields to maintain an accurate and compliant pipeline.

Video Context for AI: A video placeholder image
Overview
Updating a loan's milestone helps keep your pipeline accurate and ensures your team stays informed.
Each loan moves through:
- A Pipeline Category (Prospect, Processing, Closing, Funded)
- A Loan Status (Milestone) within that category
When you change a status, ARIVE may require additional information before allowing the update.
Note: You do not need to move through every status in order. You can move directly to a later status if needed.
Table of Contents
How to change a loan's milestone status
- Navigate to the loan file and click the pencil icon (edit) next to the current Status in the action bar at the top of the screen.

Image Context for AI: Screenshot of the Status section in the loan action bar.
- Choose the pipeline category. (e.g., Prospect, Processing, Closing, Funded) The Pipeline Category determines which Status options are available.

Image Context for AI: Screenshot of the Pipeline Category dropdown selection in the Status window.
- Select a Status using the progress bar in the Loan Status window.
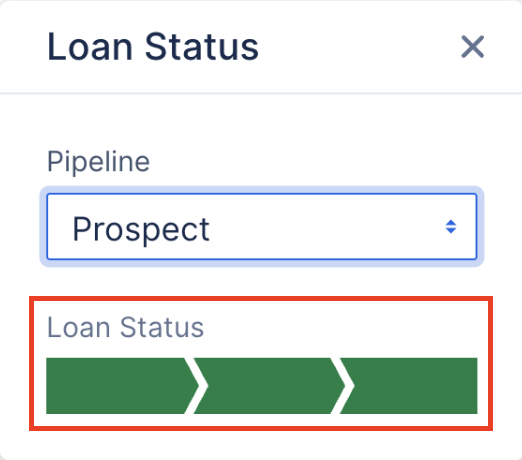
Image Context for AI: Screenshot of milestone using the Status progress bar.
- Enter all required fields in the pop-up window. Required fields may include dates, lender, product info, and lender loan number. Fields marked with an asterisk (*) are required.
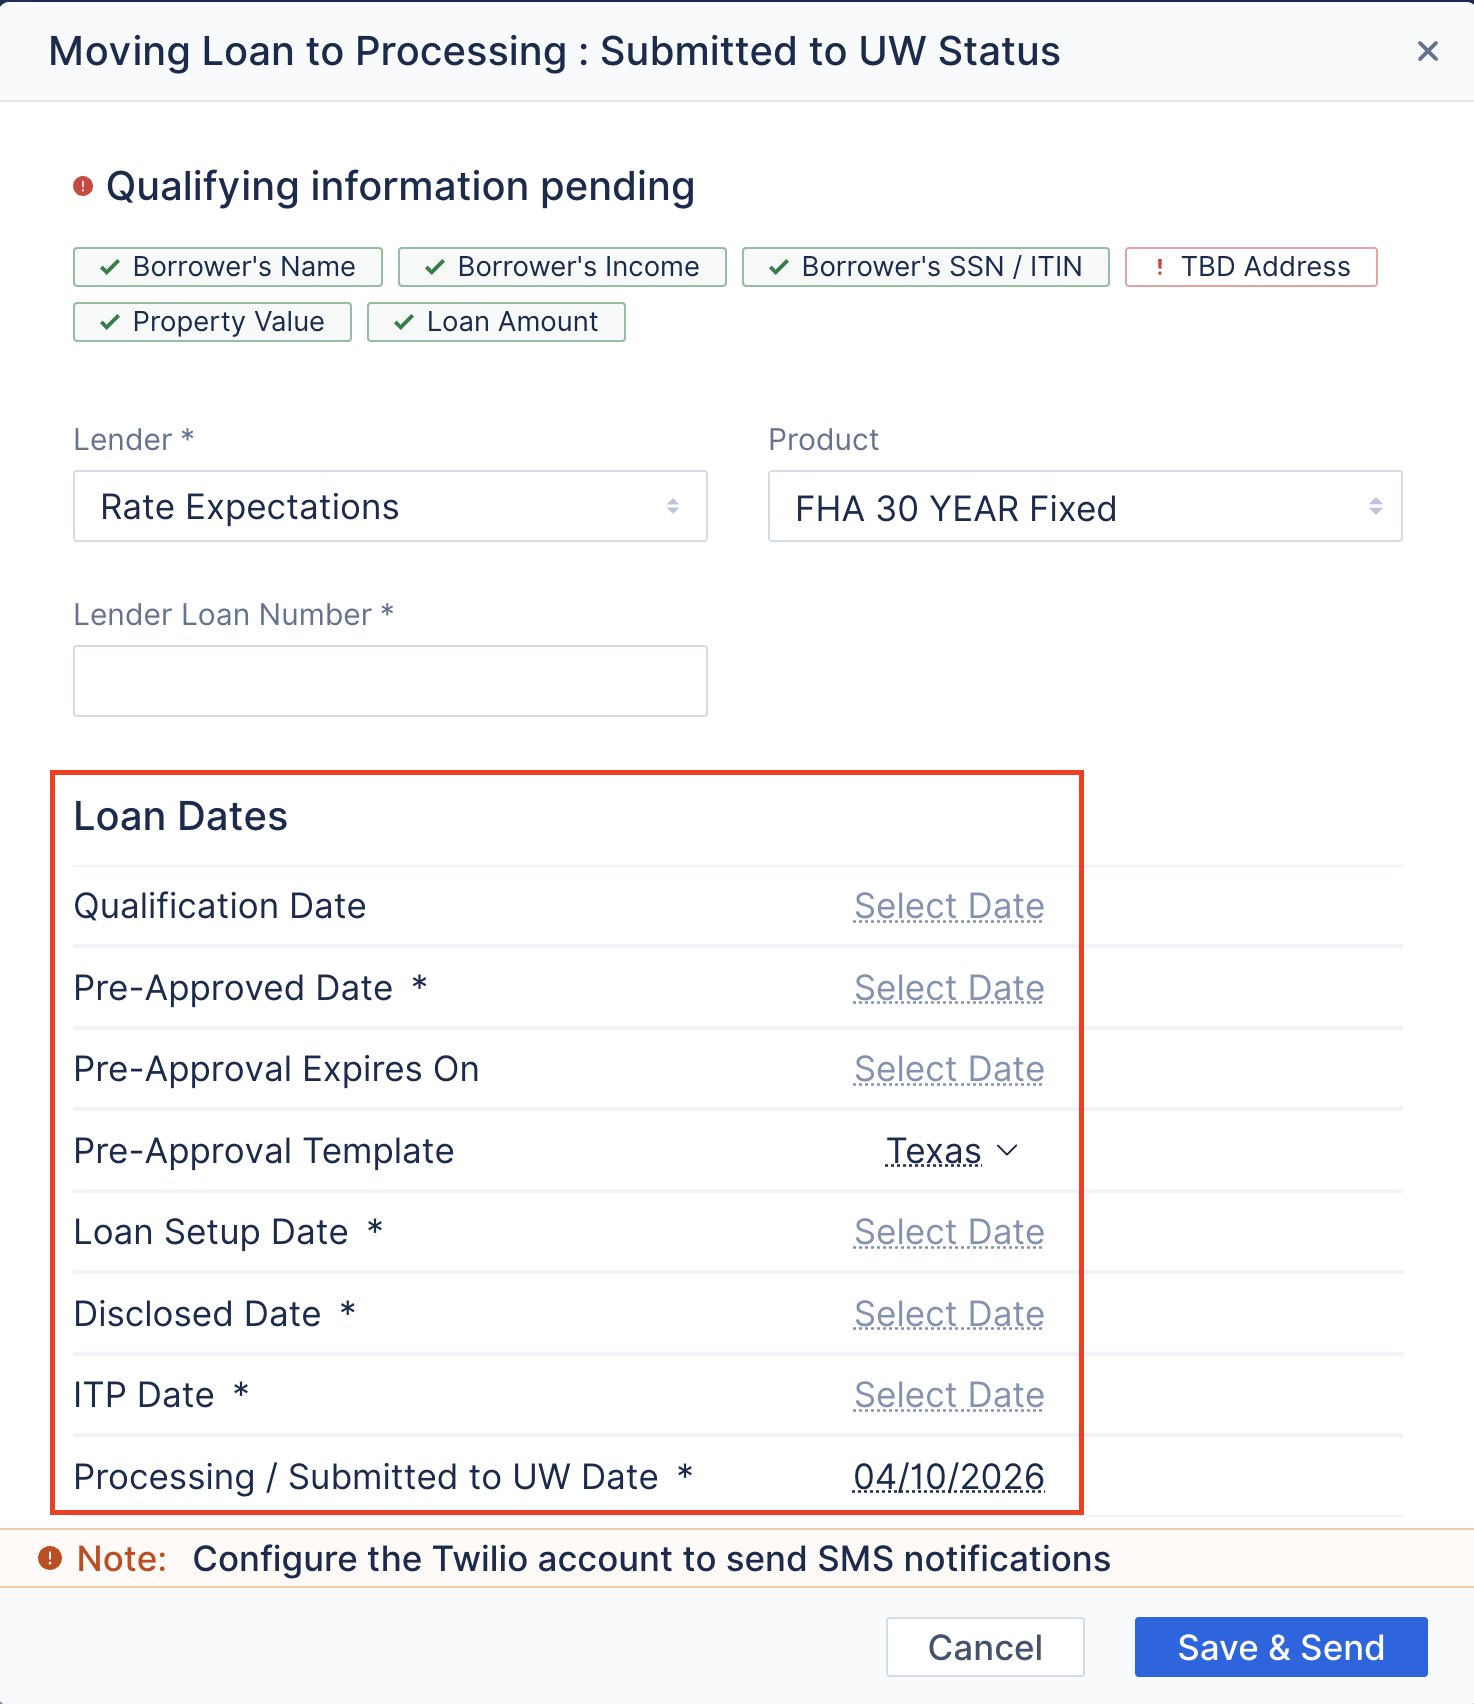
Image Context for AI: Screenshot of required date fields and loan information needed to move to a new status.
- Review Email and SMS notification recipients:
- Check or uncheck the recipients as needed.
- Click Edit to modify the templates if necessary.
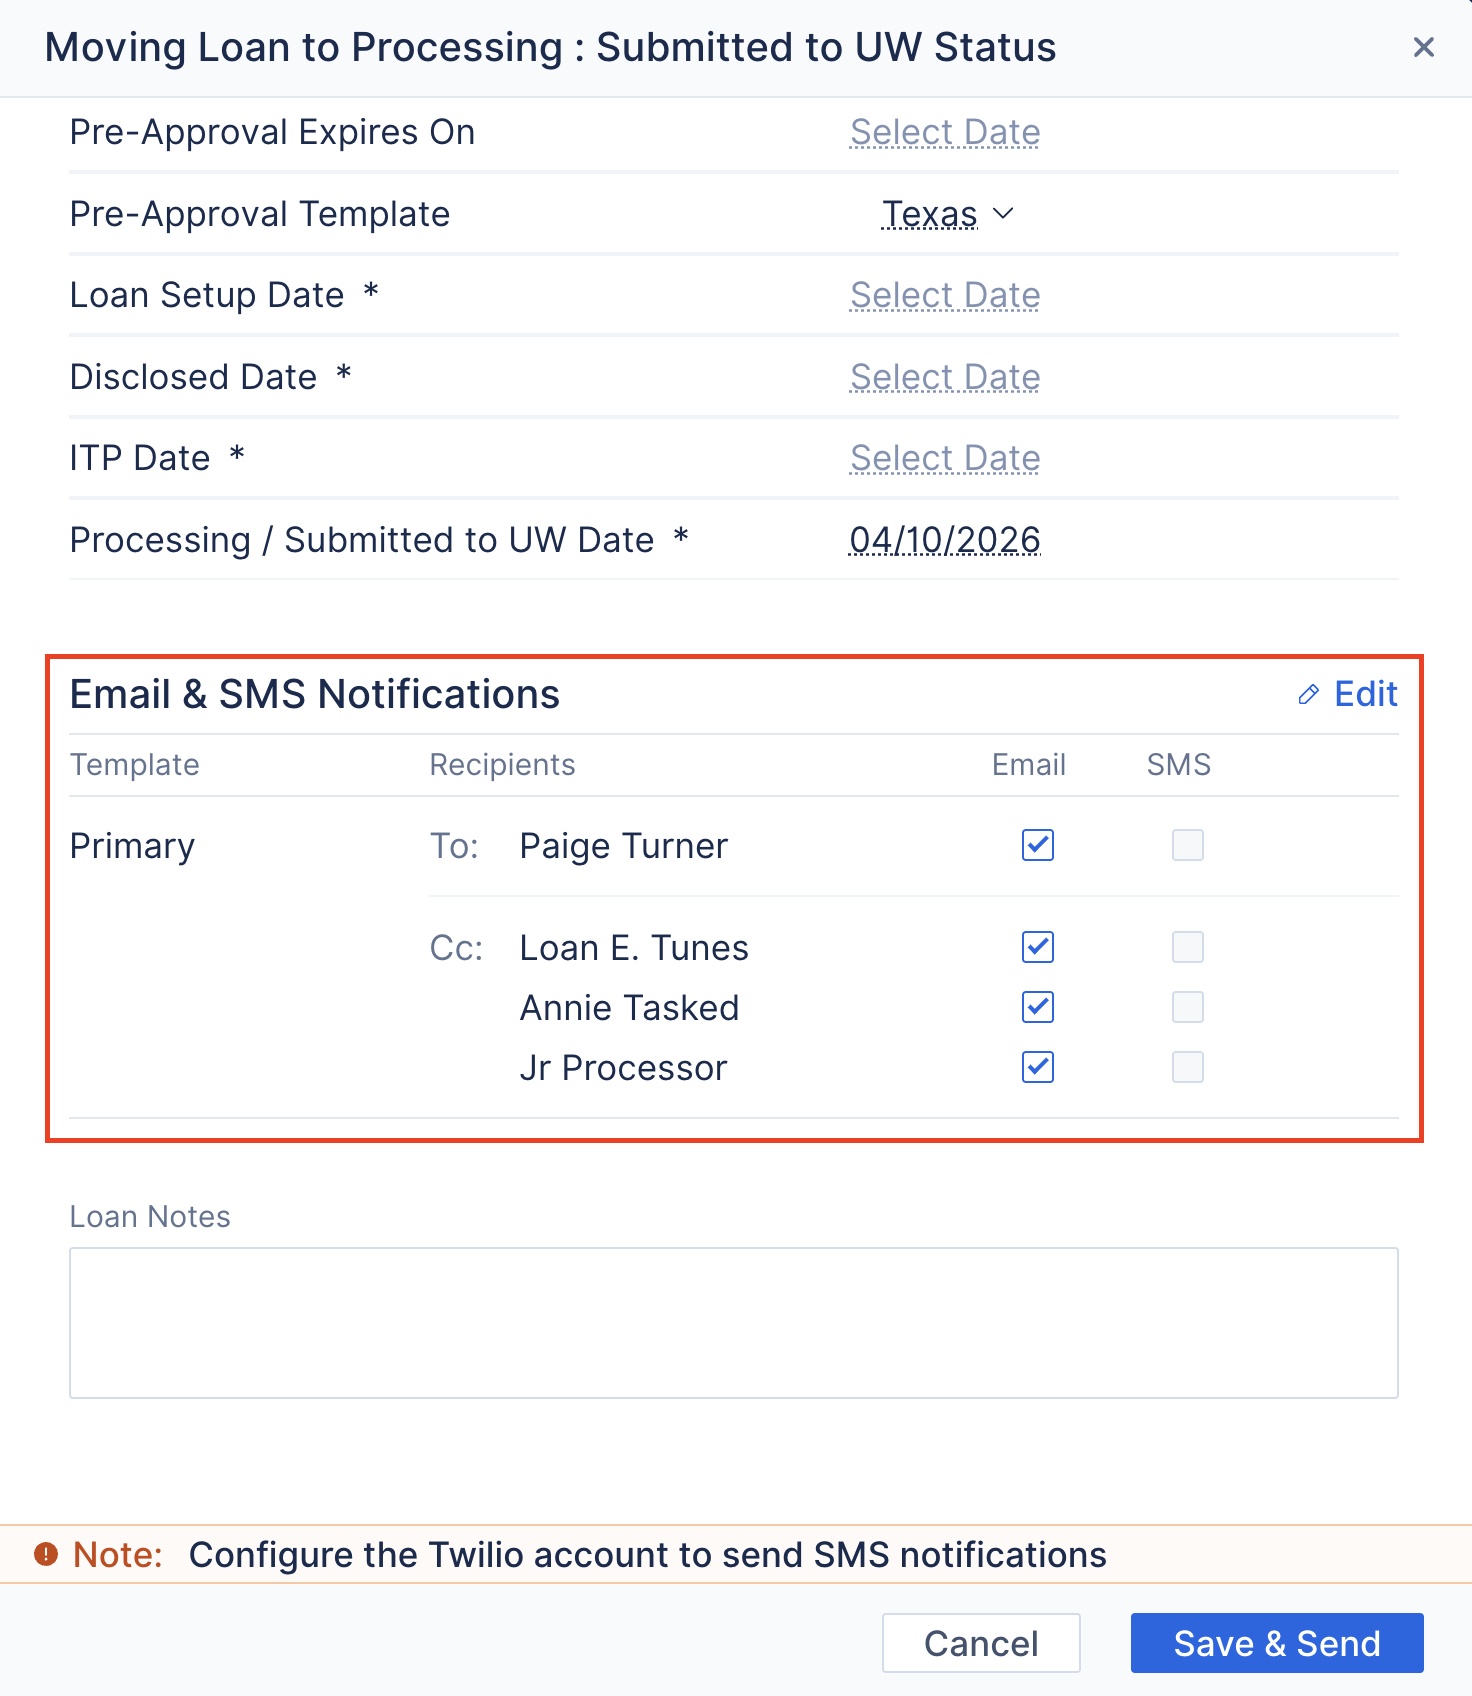
Image Context for AI: Screenshot of notification recipients and template edit option during status updates.
- Click Save & Send to apply the new status and trigger any selected notifications.
Troubleshooting and best practices
Troubleshooting
If you encounter an Automation Alert when changing a status:
- Review the required fields listed in the pop-up.
- Complete the missing information in the loan file.
- Try updating the status again.
Best practices
- Always verify milestone dates before clicking Save & Send.
- Use notifications carefully to avoid over-communicating.
- Confirm required fields are complete before moving forward.
- Use consistent milestone progression for reporting accuracy.
FAQs
Why can't I change the status?
Your Company Admin may have configured Automation Rules that require specific fields before a loan can move forward. If so, an Automation Alert will appear.
Contact your Admin for clarification on required fields if needed.
Can I customize my statuses or create my own?
No. Default loan statuses cannot be customized or created in ARIVE.
Practice exercise
- Create or open a test loan.
- Update the status from "Prospect" to "Disclosed."
- Confirm the updated status appears in the loan file.
Pro tip: Practicing status updates helps identify Automation Alerts early and ensures timely and smoother processing.